Setting up a LoRaWAN testing environment
Introduction
A LoRaWAN Gateway establishes the connection between the NBnano platform and your IoT devices. Depending on the scale of your deployment and the area you intend to cover, you may need multiple gateways. This guide provides the step-by-step process to configure and connect your gateways to the NBnano, as well as how to set up a private LAN with static IP addresses to connect your devices.
Items Needed
| Product Name | Quantity | Image |
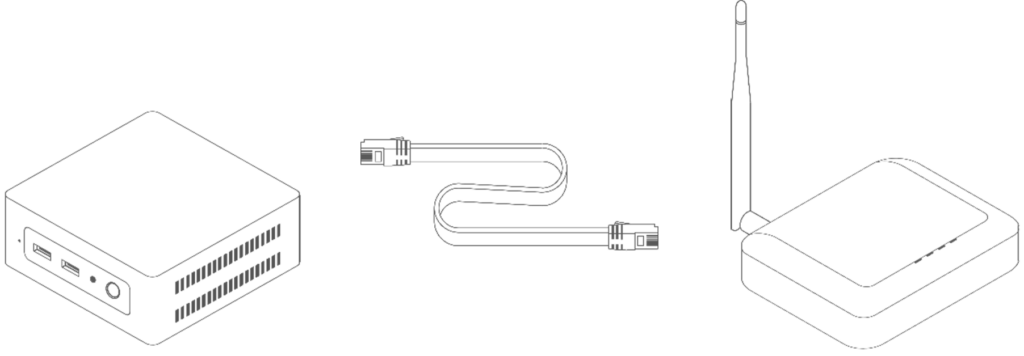
| Registered NBnano + package contents | 1 | |
| Ethenet Switch (not included) | 1 | |
| Gateway Package Contents | minimum 1 | 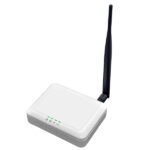 |
Configuring the NBnano
Before configuring gateways, the NBnano must have its final LAN settings, and LoRaWAN® region configured.
- Connect to the NBnano WiFi:
- Connect to your NBnano’s WiFi network using the credentials set during registration.
- Open the NBnano Platform:
- Open your browser and navigate to 192.168.12.1 to access the NBnano platform.
- Login to the NBnano:
- Log in with your credentials and go to Project > Network. Here, you should see one network listed.
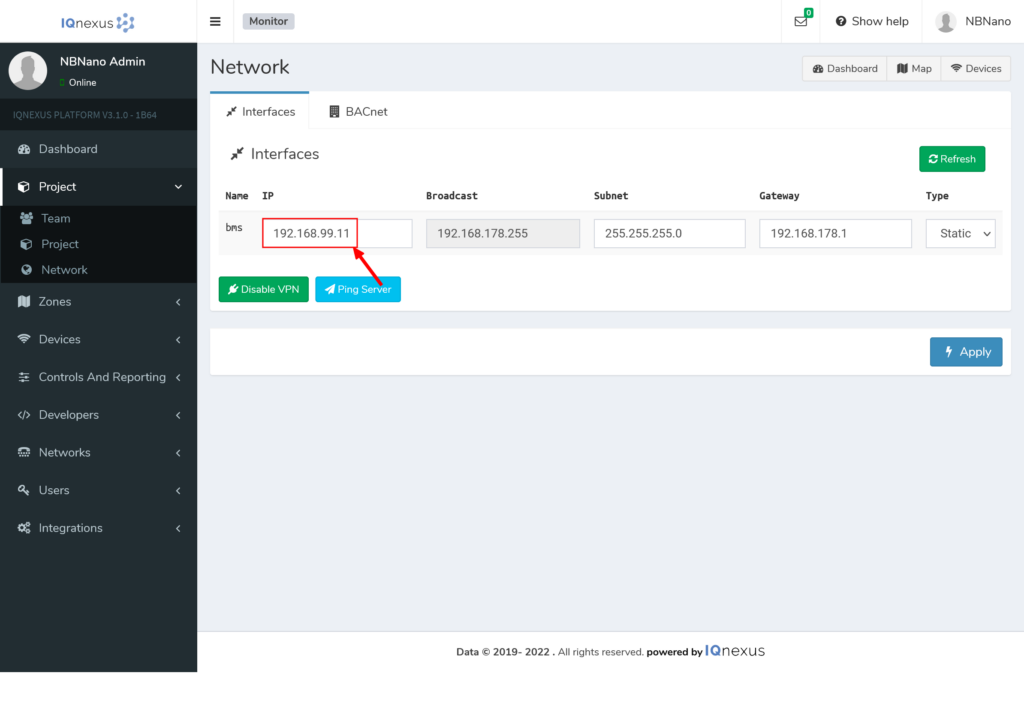
- Set Static IP for LAN:
- Change the BMS network interface from DHCP to Static and assign it a new IP address (e.g., 192.168.99.11). Click Apply for the changes to take effect.
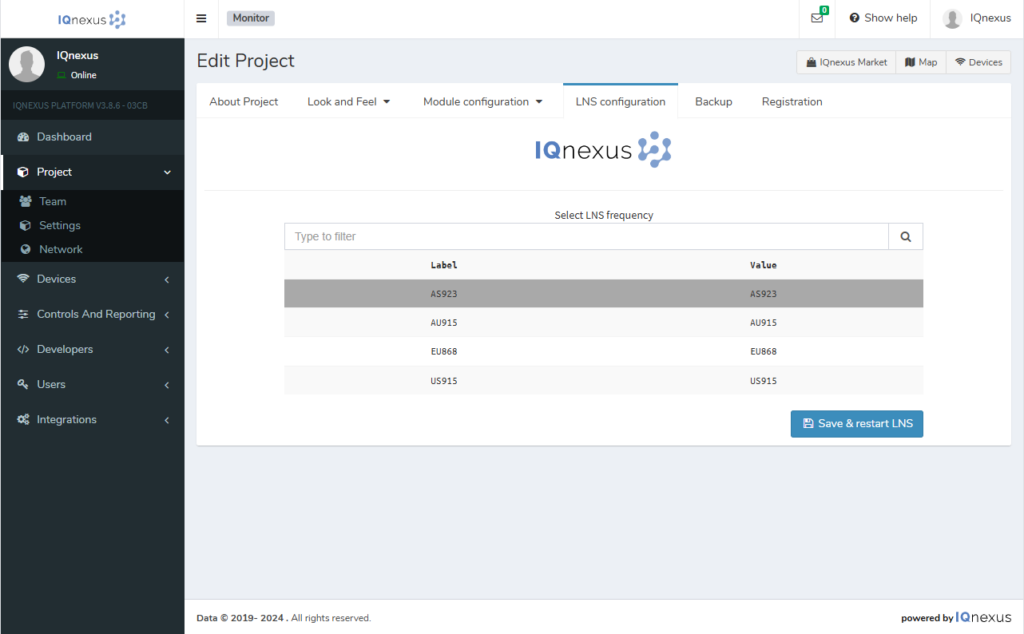
Configuring the LoRaWAN® region
- Navigate to LNS Configuration:
- Navigate to Project -> Settings -> LNS configuration, here you will see a list of available LoRaWAN® Regions.
- Select the Region:
- Choose the appropriate LNS frequency for your region and click Apply to confirm your selection.
Configuring the LoRaWAN Gateways
The Browan Indoor Femto Gateway is easy to configure and will connect to the NBnano, enabling communication between your devices and the platform. Depending on your requirements, additional gateways may be necessary.
- Connect the Gateway:
- Plug the gateway into your network or directly into the NBnano using an Ethernet cable. Ensure both devices are powered on.
 DO NOT POWER THE GATEWAY USING THE USB PORT ON ANOTHER DEVICE. GATEWAY REQUIRES 5V 2A SUPPLY TO FUNCTION PROPERLY.
- Power on the Gateway:
- Power the gateway and ensure the power light turns solid green.
- The SSID will be “AP-<Last 6 digits of MAC address,” which you can find on the back of the gateway
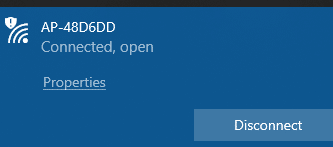
- Connect to the Gateway WiFi:
- Select the SSID and click Connect.
- Open your browser and navigate to 192.168.55.1.
- Login to the Gateway:
- Login with the credentials:
- Username: admin
- Password: admin
- Login with the credentials:
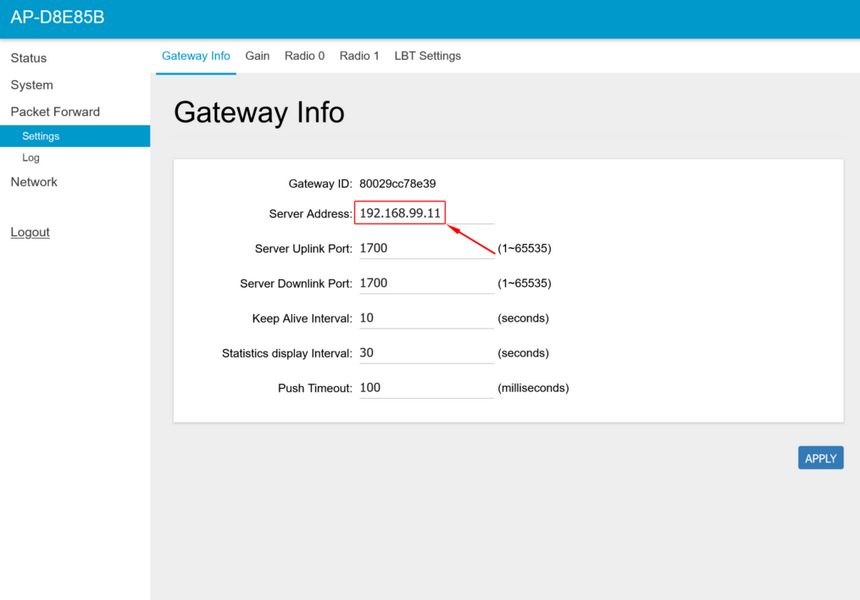
- Configure the Gateway:
- Go to Packet Forward → Settings to configure the Server Address to the IP of your NBnano (192.168.99.11 in this example).
- Take note of the Gateway ID, as this will be needed when adding the gateway to the NBnano platform.
Configuring Frequency Band and Radio Settings
- Select Frequency Band:
- Under Packet Forward → Settings, configure the Central Frequencies for Radio 0 and Radio 1 based on your region’s frequency band.
AS923
Packet Forward → Settings → Radio 0
|
Central Frequency |
923500000 |
Packet Forward → Settings → Radio 1
|
Central Frequency |
924300000 |
AU915
Packet Forward → Settings → Radio 0
|
Central Frequency |
917100000 |
Packet Forward → Settings → Radio 1
|
Central Frequency |
917900000 |
US915
Packet Forward → Settings → Radio 0
|
Central Frequency |
904200000 |
Packet Forward → Settings → Radio 1
|
Central Frequency |
905000000 |
EU868
Packet Forward → Settings → Radio 0
|
Central Frequency |
867400000 |
Packet Forward → Settings → Radio 1
|
Central Frequency |
868200000 |
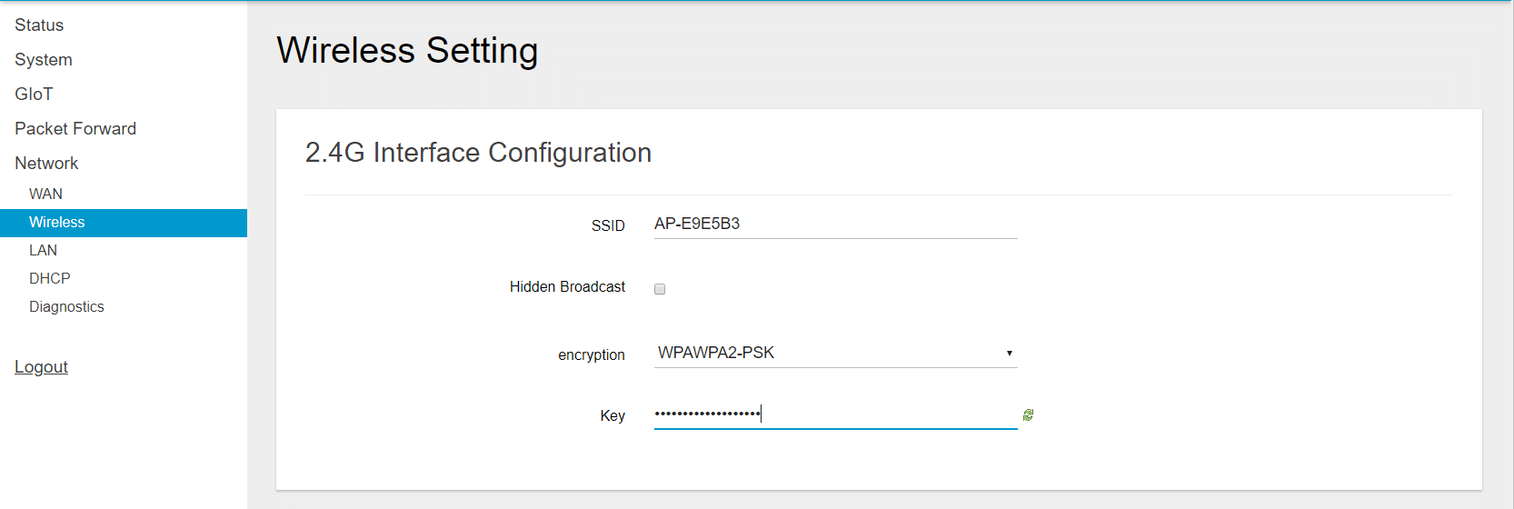
Change the Gateway WiFi AP Password
For security purposes, it’s crucial to set a secure WiFi AP password. An open AP can provide an entry point into your local area network.
-
Navigate to Network → Wireless and select WPA/WPA2-PSK encryption.
-
Enter a strong new password in Key for the WiFi AP.
Configuring WAN Setup
- Set Static WAN IP:
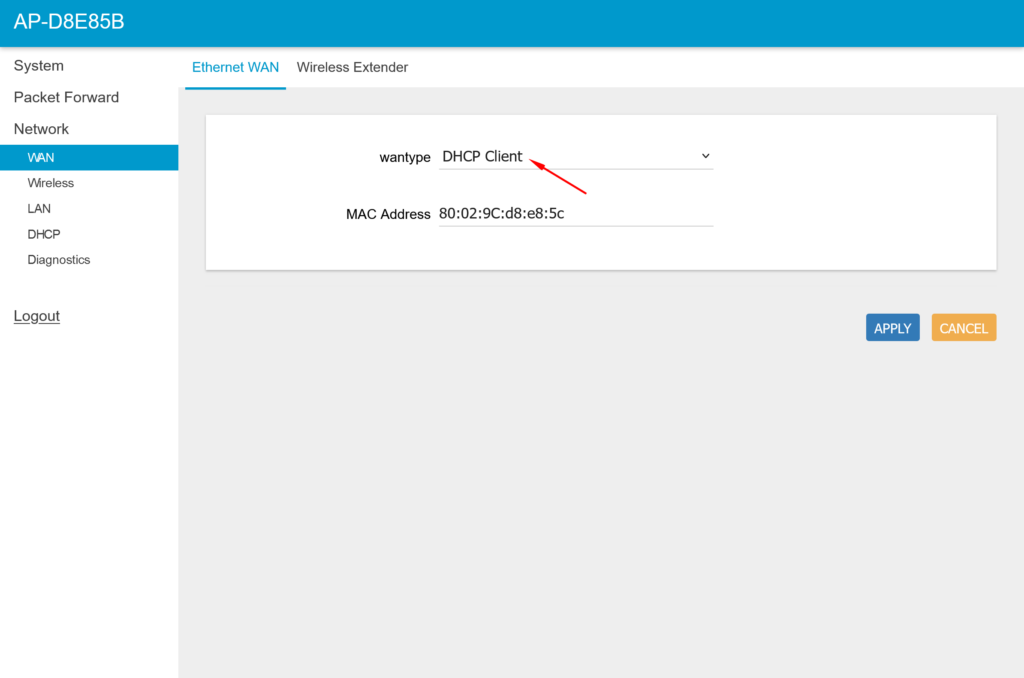
- Go to Network -> WAN -> Ethernet WAN.
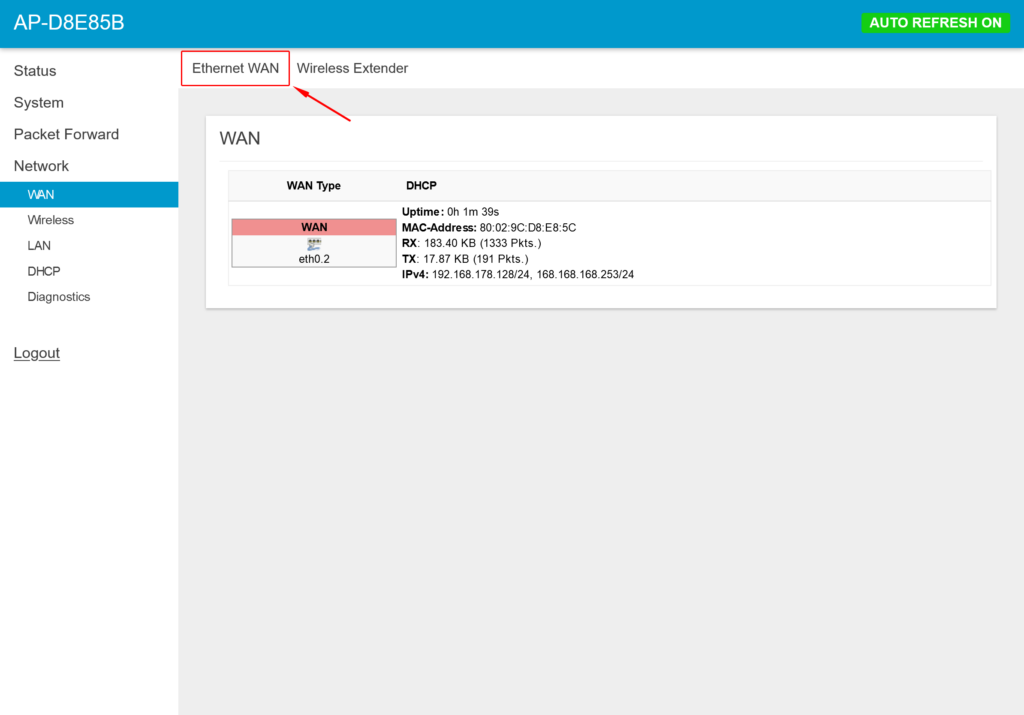
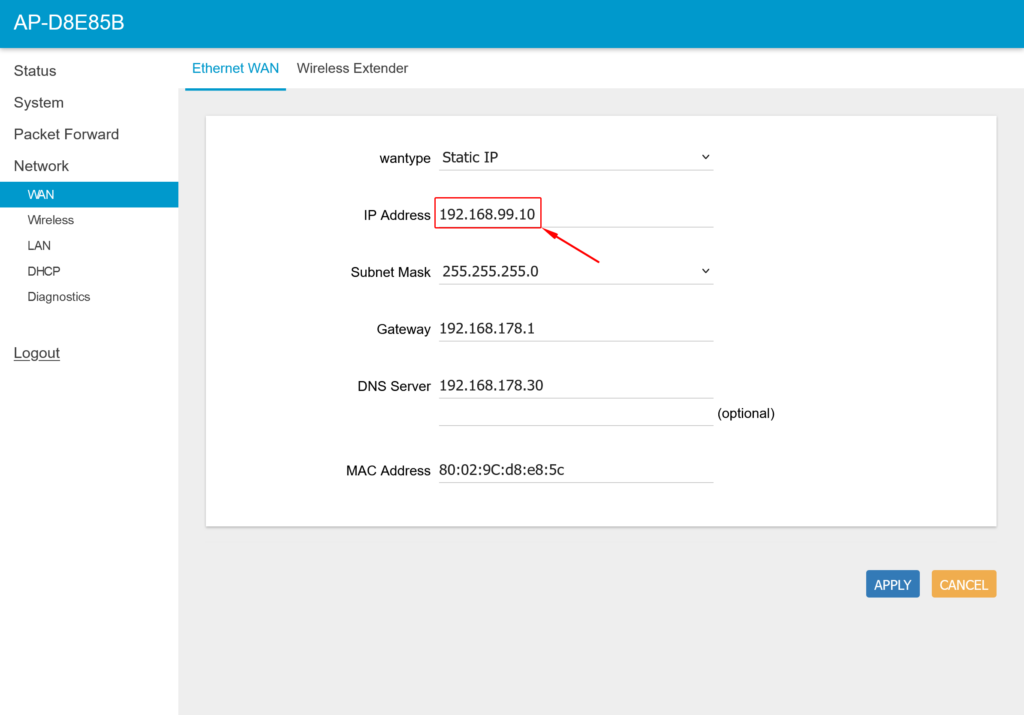
- Change the WAN type from DHCP Client to STATIC IP:
- Set IP Address:
- Assign the gateway an IP address within the same range as the NBnano (e.g., 192.168.99.10) as seen below. Ensure the IP is available on your local network.
- Apply Changes:
- After applying the changes, the gateway will reboot.
Testing Gateway Connectivity (Optional)
After the gateway has rebooted, ensure that the NBnano and gateway can communicate:
- Navigate to Network > Diagnostics in the gateway interface.
- Enter the NBnano IP address (192.168.99.11) in the PING field.
- Click PING to test the connection. A successful test will show no packet loss.
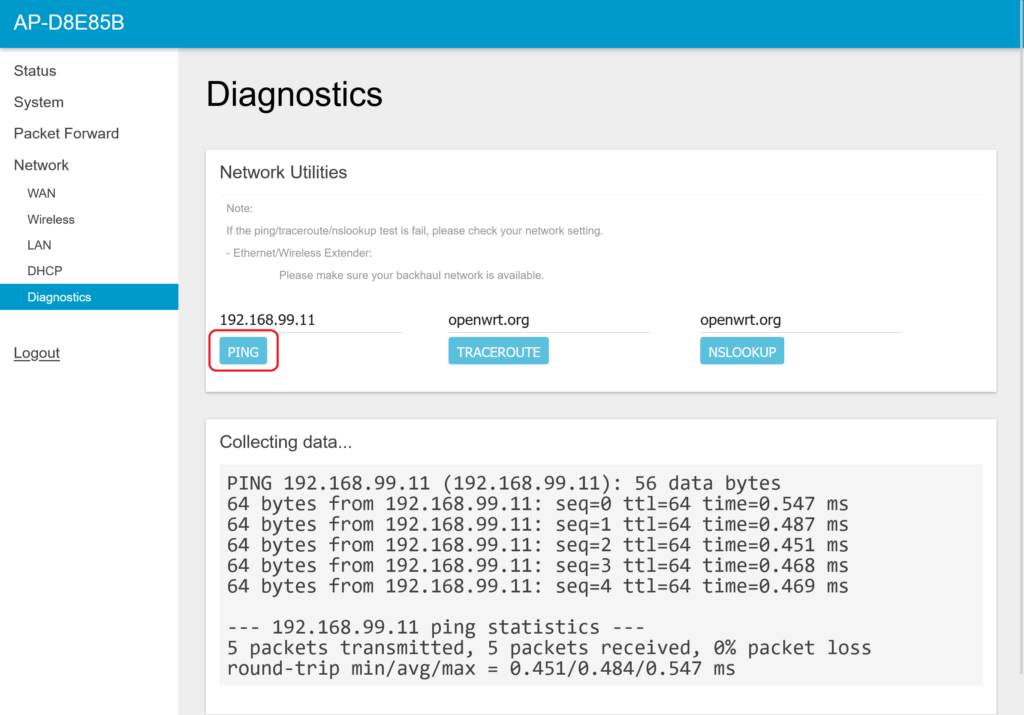
If there is an issue with network configuration or cabling the output will show 100% packet loss. In the case of an error carefully follow the instructions above, ensuring gateway and NBnano are on the same IP range, and the gateway is wired into the same network as the NBnano.
PC Network Configuration (Optional)
If you wish to access the NBnano platform directly through the LAN, follow these steps to configure a static IP on your PC:
- Open the Control Panel and click on Network & Internet.
- Go to Network and Sharing Center and click the Ethernet connection.
- Select Properties, then choose Internet Protocol Version 4 (TCP/IPv4).
- Set a static IP within the same range as your NBnano (e.g., 192.168.99.x).
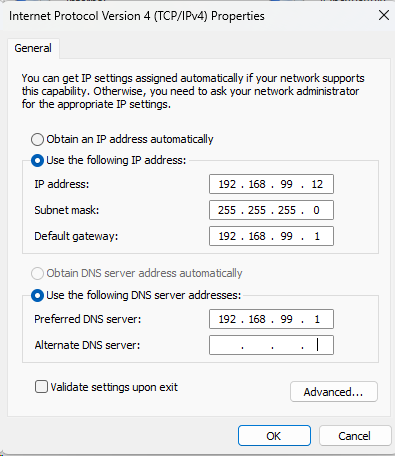
You can now access the NBnano Platform through the LAN using a browser pointing at the NBnano IP address (192.168.99.11 in this example).
Adding Gateways to the NBnano Platform
LoRaWAN Gateway Driver
To add a LoRaWAN Gateway to the NBnano platform:
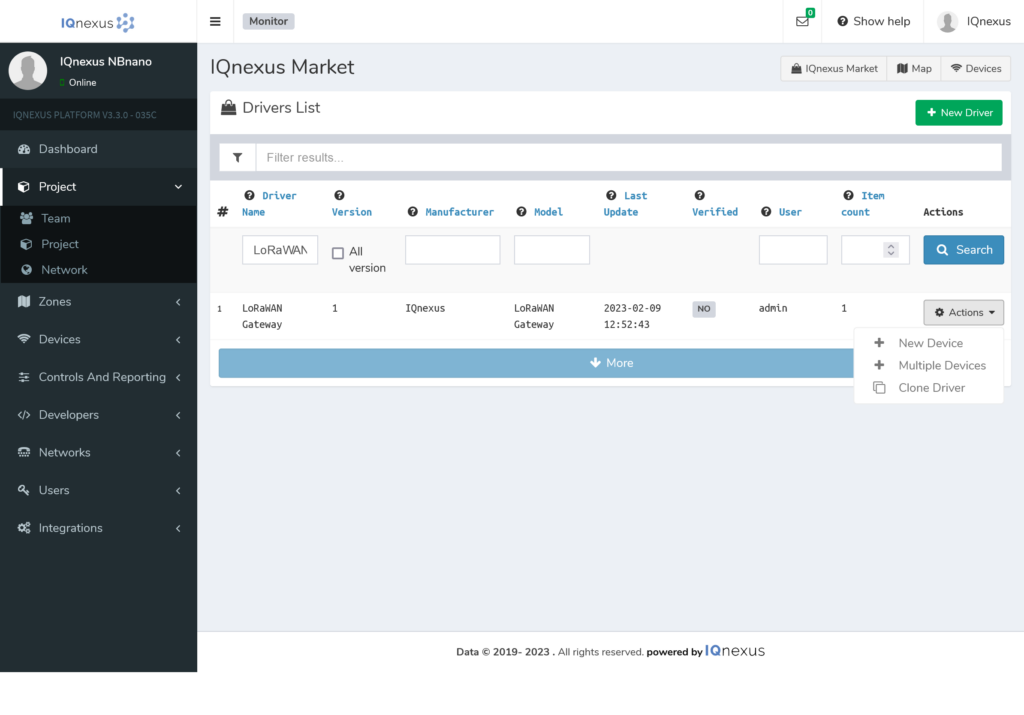
- Go to the IQnexus Market:
- Find LoRaWAN Gateway and select New Device under Actions.
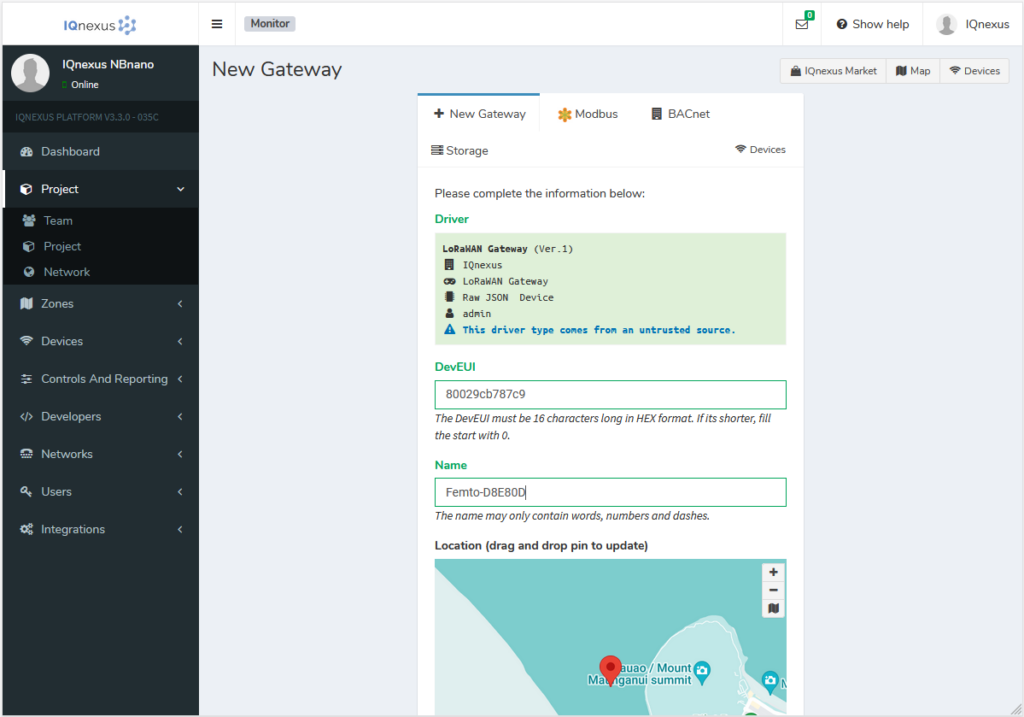
- Enter Gateway Details:
- DevEUI: This is the ID of the gateway. Find this ID in the gateway’s Packet Forward Settings page (192.168.55.1).
- Name: Enter a name for your gateway.
- Apply Changes:
- Click Apply to add the gateway.
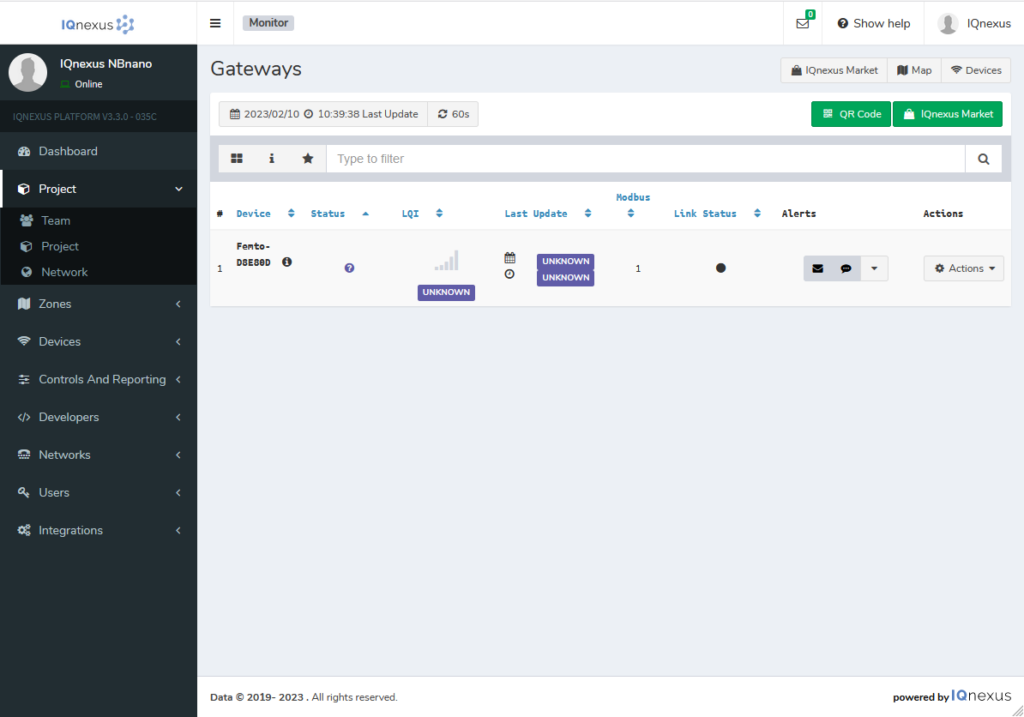
You should be taken back to Devices > Gateways and there you will see your new gateway. Once connected, the gateway’s link status will turn green. Refresh the page if necessary.
Debugging Connectivity Issues
If your gateway’s link status never changes to green, check the following settings:
- Ensure the DevEUI and Gateway ID match.
- Verify that both the NBnano and gateway are on the same network segment.
- Confirm that the NBnano platform is accessible via LAN.
- Make sure that the Server Ports are set to 1700 in the gateway’s Packet Forward Settings.
Summary
- First, we navigate to the NBnano through the web browser by heading to “192.168.12.1” (after connection to its WIFI hotpot).
- We then changed the LAN of the NBnano in the network section to one of our own preference, in this example this was changed to 192.168.99.11.
- After we have configured the LAN of the NBnano we connect to our gateway through a WIFI connection. We do this so we can change the network preferences to suit our local configuration.
- Once we are inside the gateway settings we set the Server Address to the IP of our NBnano. This is so our gateway has an address to relay data to.
- We also configure our Ethernet WAN type from DHCP to STATIC so we can manually set the IP address of the gateway to an available IP address on your local network.
- We ensured the gateway and NBnano can communicate successfully via ping.
- Finally we added the gateway to the NBnano platform.
Need Assistance?
If you encounter any issues during the setup or registration process, please feel free to Contact us.