Adding Devices to the NBnano Platform
Introduction
Adding a device to the NBnano Platform creates a virtual instance of the device, enabling you to manage its data, track its location, and set up alerts for unexpected events. The data from the device can be visualized, monitored, and controlled within the platform, offering seamless integration into your IoT ecosystem.
Finding Your Device’s Driver
Each IQnexus device has an associated driver that helps the platform understand how the incoming data is formatted. To find the correct driver for your device:
- Locate the Model Number:
- The model number can be found on the sticker on the back of your device.
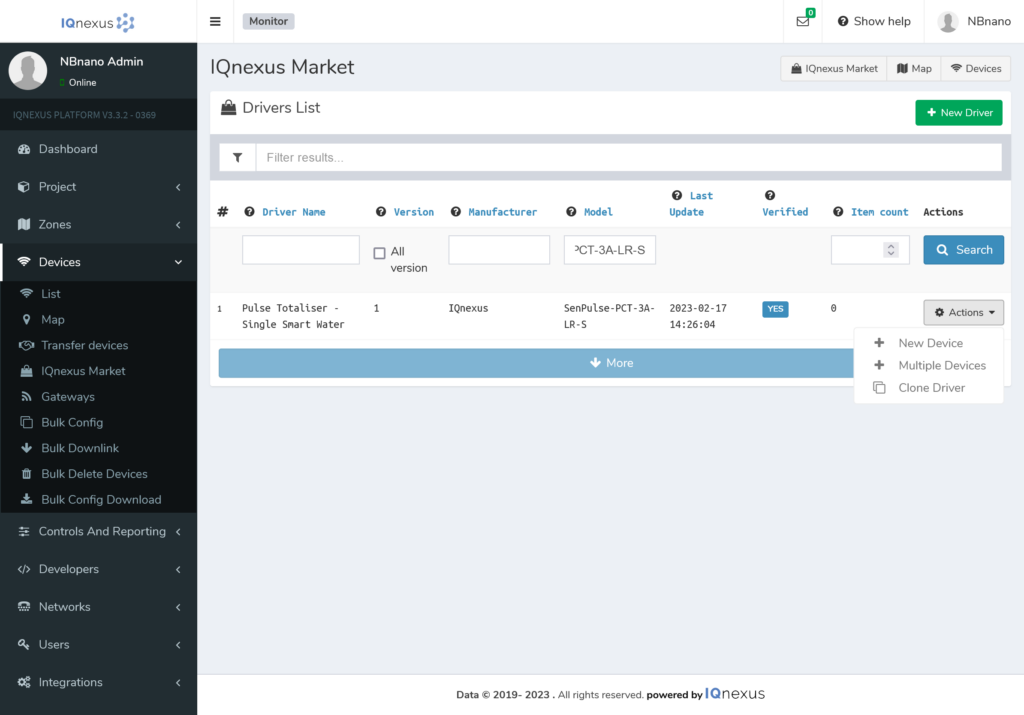
- Search for the Device Driver:
- Navigate to your project’s Devices section.
- Select IQnexus Market at the top right of your screen.
- In the search field, enter your device’s model number in the Model field.
- Add New Device:
- Once you find the correct driver, click on Actions and select New Device from the dropdown menu.
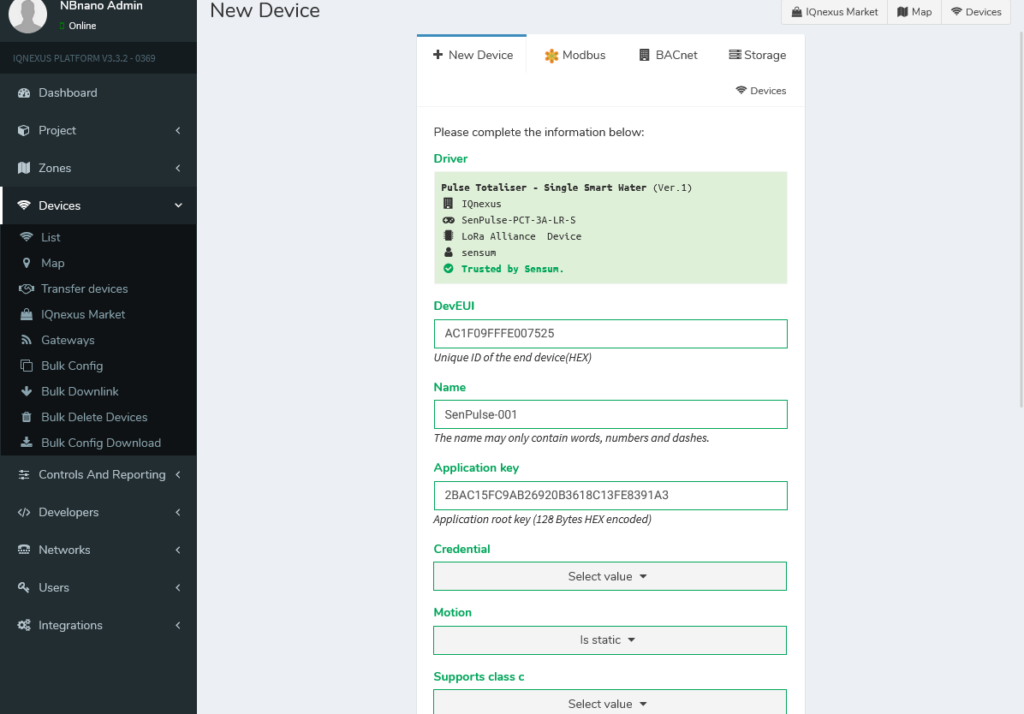
Device Info Configuration
After selecting your device driver, you will be directed to a form to complete the device setup. Depending on the device and driver, you may encounter some or all of the following tabs and fields:
New Device Tab
- Name:
- This is required for all devices and must be unique to the platform. It can include alphanumeric characters, spaces and hyphens (e.g., 12-Smith-st Smart-meter).
- DevEUI:
- This is required for a LoRa device and is your device identifier on the LoRa network. Find yours here.
- Application Key:
- Every device on the Lora network using Over-the-Air Activation (OOTA) will have an application key, which is necessary device activation.
- Credential:
- Depending on your IoT network, a credential token may be required.
- Motion:
- Select whether your device is static or in constant motion. If motion is selected, the platform will update the device’s location based on its GPS coordinates.
- Supports class c:
- Indicate if your device supports Class C for LoRaWAN. More information about LoRaWAN Classes can be found here.
- Location:
- Set the device location by either dragging the pin on the map or manually entering an address.
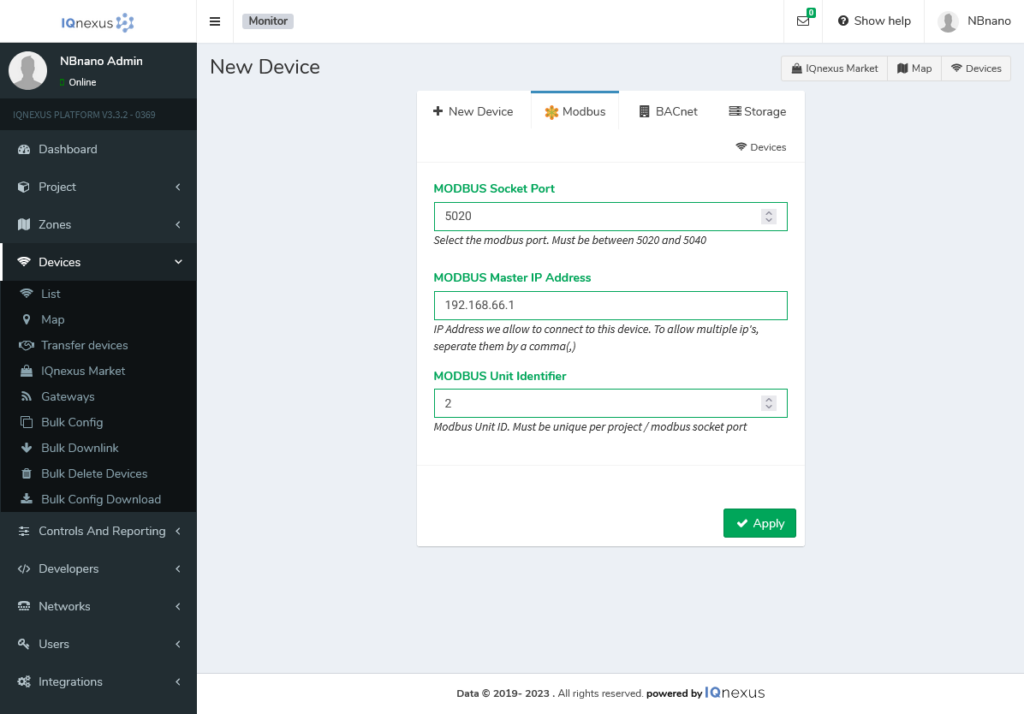
Modbus Tab
- MODBUS Unit Identifier:
- This is required if your project uses MODBUS. It should be a unique number between 1 and 254, representing the MODBUS ID of the device (used for retrieving data into the Building Management System, or BMS).
- MODBUS Master IP Address:
- This field restricts who can access the device via MODBUS. Setting it to 0.0.0.0 allows unrestricted access, while specifying an IP address limits access to that specific address.
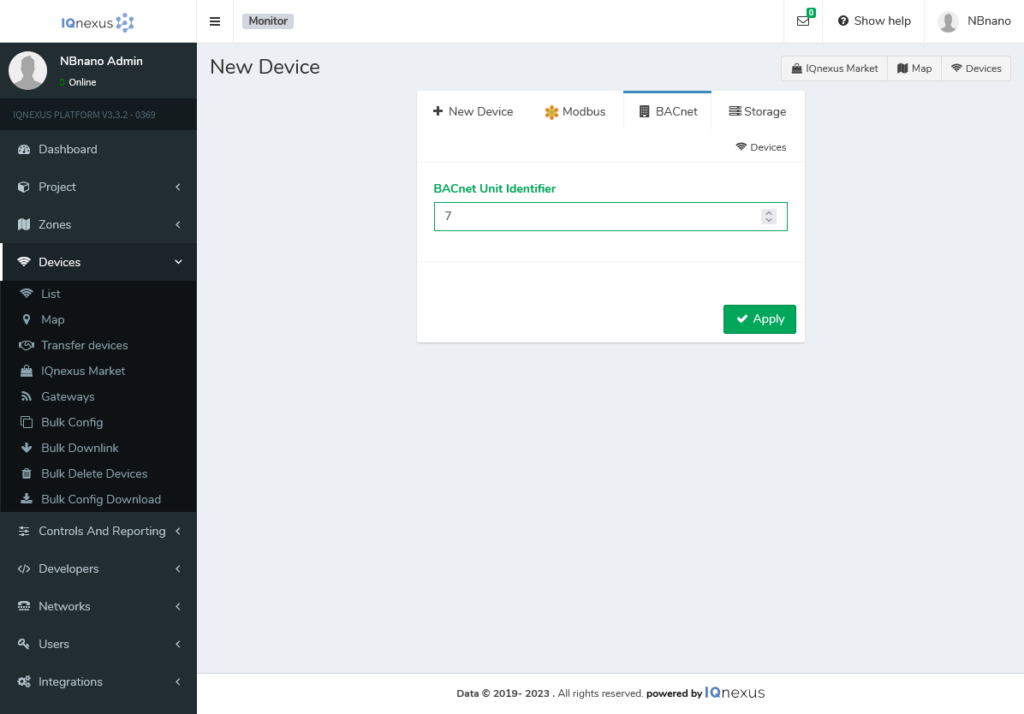
BACnet Tab
- BACnet Unit identifier:
- This is required for BACnet integration. It represents the BACnet unit ID for retrieving data into your BMS system.
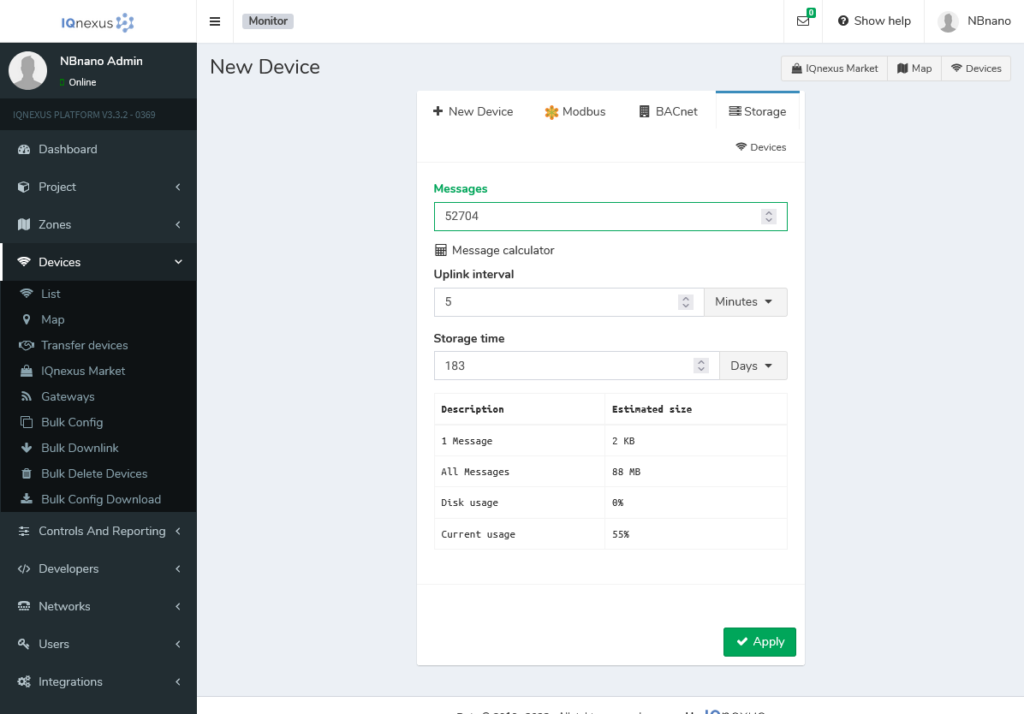
Storage Tab
- Messages:
-
- Configure how long uplink data will be stored. The system calculates how much storage space the device will require based on the upload interval.
- Note that individual data records are deleted after the configured storage period. However, daily data records are retained to keep historical data and trends.
Finalizing Device Setup
After completing the necessary configurations for your device, click Apply to add the device to the platform.
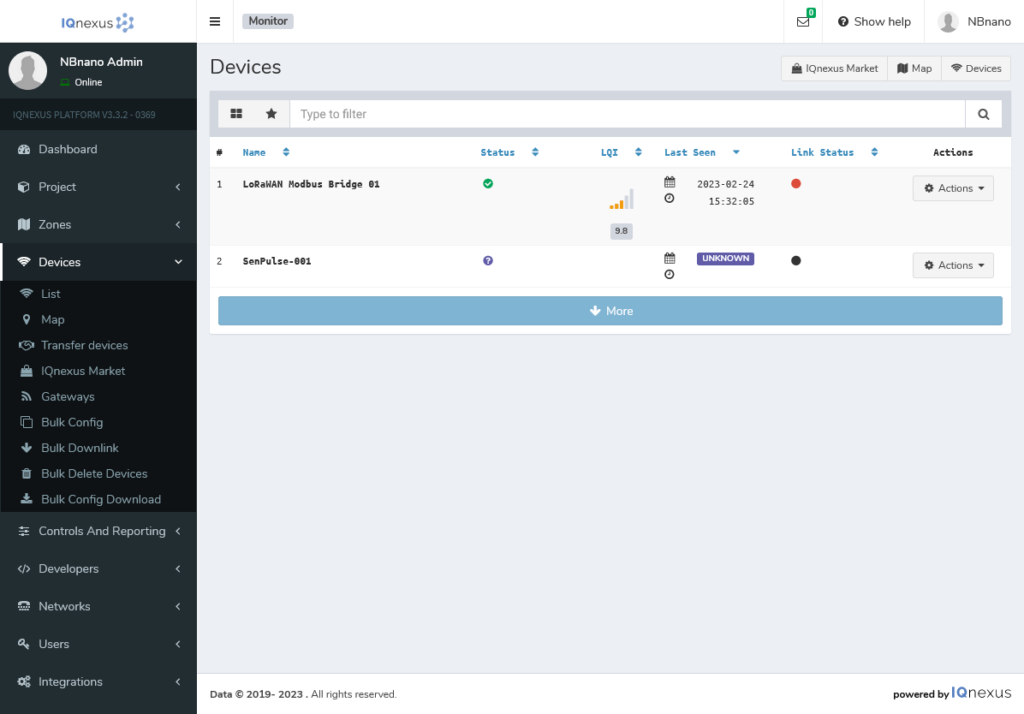
- Navigate to the Devices screen, where you should see your new device listed.
- Once the device receives a valid uplink, the device status will turn green, indicating that it is active and connected.
Troubleshooting & Support
To ensure your device is fully integrated and functioning optimally, verify that all fields are correctly filled out and that your device is configured to send uplinks to the platform. If you encounter any issues:
- Contact Us for support, and our team will assist you in resolving any configuration problems.