How Can We Help?
Modbus TCP Slave
Overview
If you have a Modbus slave device that you would like to link to the NBnano platform, this guide will walk you through the process. We will use an example of a local air quality sensor that is already set up with a driver in the IQnexus Marketplace.
Steps to Add a Modbus Slave Device
- Prepare the Driver:
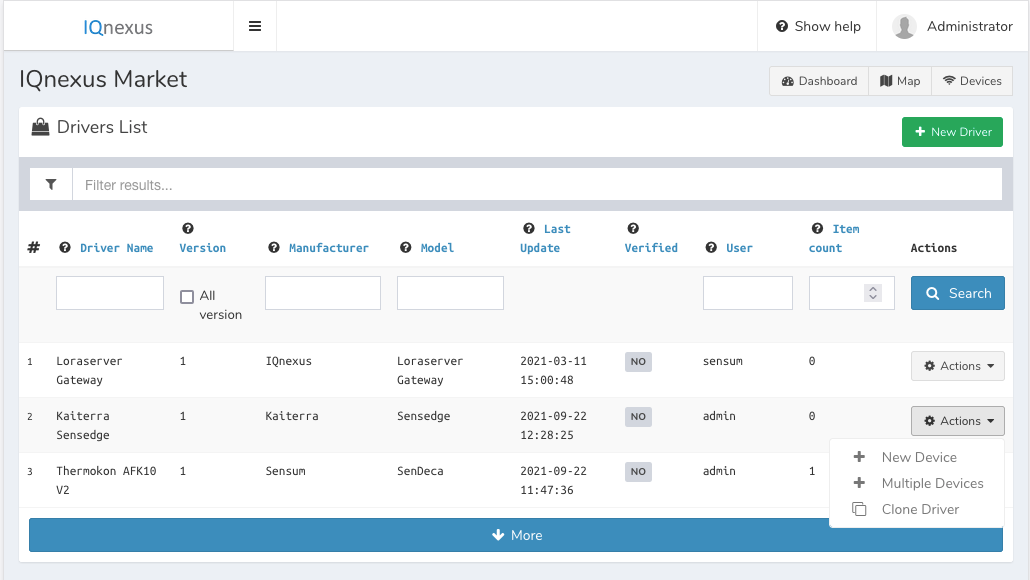
- Navigate to the IQnexus Marketplace, select your driver, and choose ‘New Device’ from the action menu.

- Create a New Device:
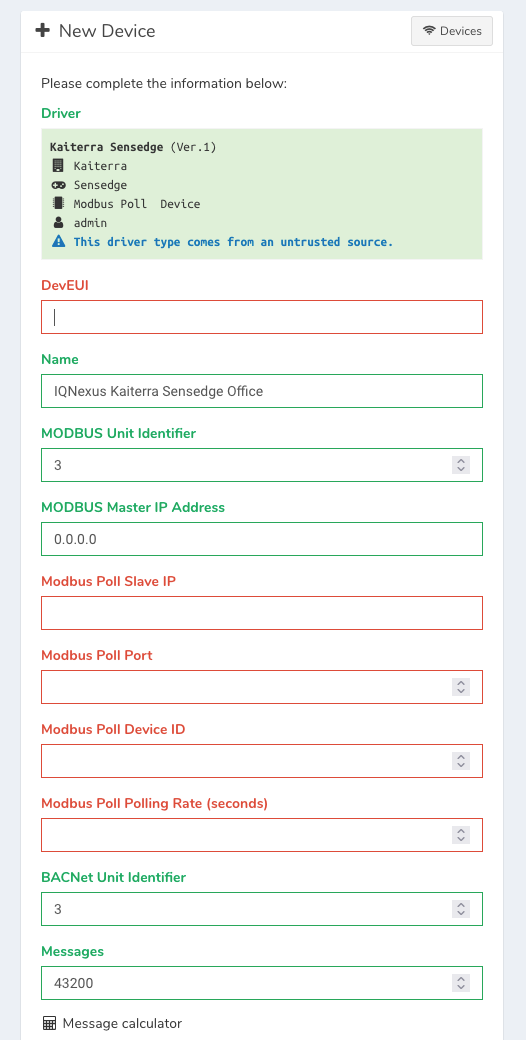
- The create device screen will display, and you should see the fields required to set up your Modbus device, assuming the driver is set up correctly.

Fields to Configure:
Modbus Master IP Address:
- This field defines who can retrieve data from this device.
-
- If set to 0.0.0.0, anyone can access the device via Modbus, provided they know the IP.
- To restrict access, set this field to the specific IP address you will use to retrieve the data.
Modbus Poll Slave IP:
- Enter the IP address of the Modbus slave device from which you want to retrieve data.
- For example, 192.168.178.106.
Modbus Poll Port:
- This is the port used by the Modbus device to exchange data.
- For example, 30000.
Modbus Poll Device ID:
- The device ID used by the Modbus sensor.
- For example, the sensor ID is 1.
Modbus Poll Polling Rate (seconds):
- This defines how often the device should request data from the slave device.
- For example, setting this to 30 seconds will make the platform request data from the sensor every 30 seconds.
- The value can be rounded up to a multiple of 10 seconds (e.g., setting it to 43 seconds will poll every 50 seconds).
Finalizing the Device Setup:
- After entering the required details, click Save to add the device.
- Once the device is saved, it will start showing data in the logs according to the polling rate you set.
Need Assistance?
If you have any issues or further questions, please Contact Us for support.

