How To Add a Java Script Parser To a Driver
Adding the Java Script Decoder
To add the Java Script decoder to your driver you will need to edit or create a new driver. Navigate to the driver information tab and change the uplink parser field to Custom JS Parser. This will create a new tab to navigate to called JS Parser
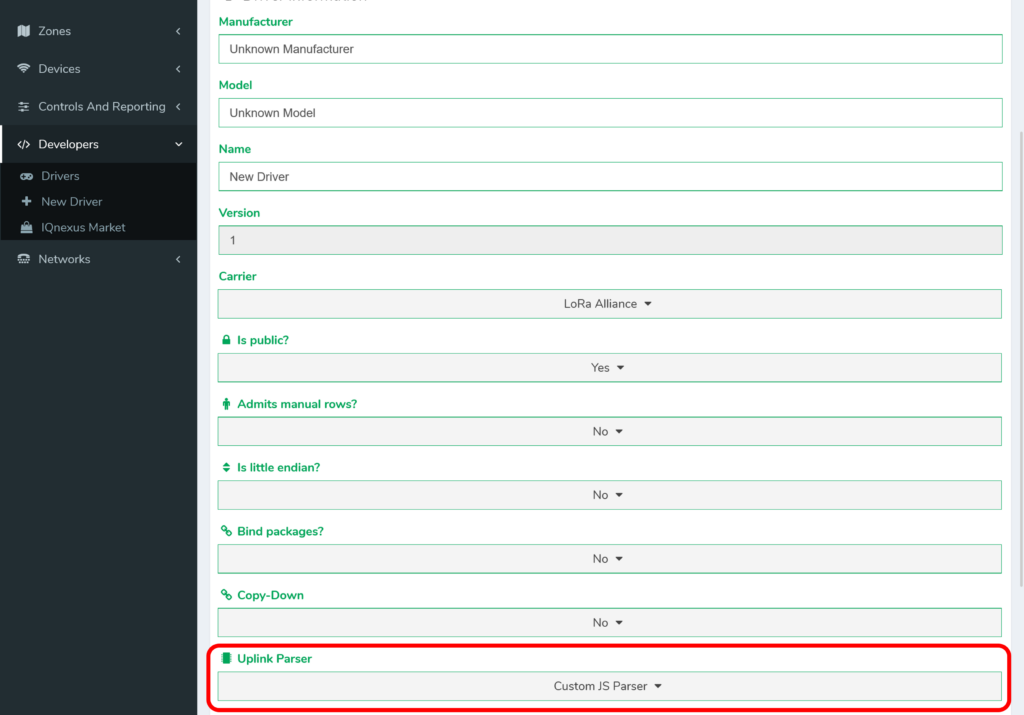
Once you navigate to this tab you will find a text area to place the Java Script code for the parser. Here you may copy and paste your JS parser code.
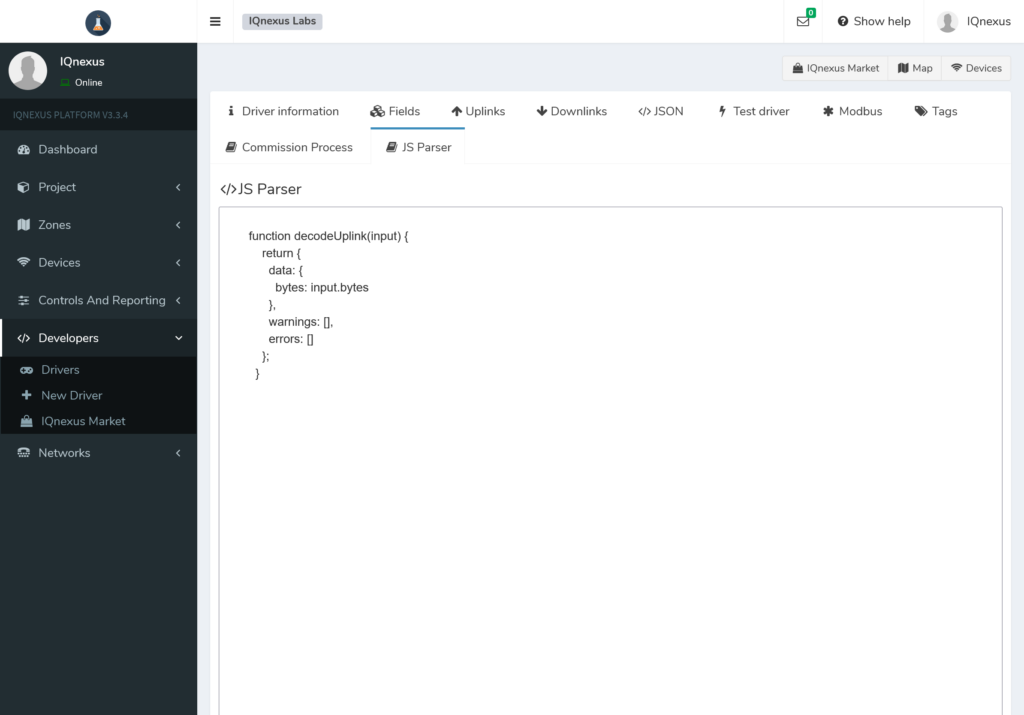
The JS parser must be based on the TTN V3 Javascript decoder, which means it needs to follow these rules:
1. The function must be called decodeUplink with a single input variable.
2. The input variable will be a JSON object of structure { bytes: [byte1, byte2,...,byten], port: N }
3. The function must return a JSON object of structure { data: { kpi1: data1, kpi2: data2, ... , kpin: datan } } Note: warnings are currently not supported. If errors is populated it will cause only the raw payload to be logged.
Note: The platform will automatically flatten and lowercase the returned structure and KPIs
so: data: { temperature: 20, someField: { value1: 40, vAlUe2: 50 } }
Will turn into: data: { temperature: 20, somefield_value1: 40, somefield_value2: 50 }
See example of JS parser below:
Displaying JS Parser Data
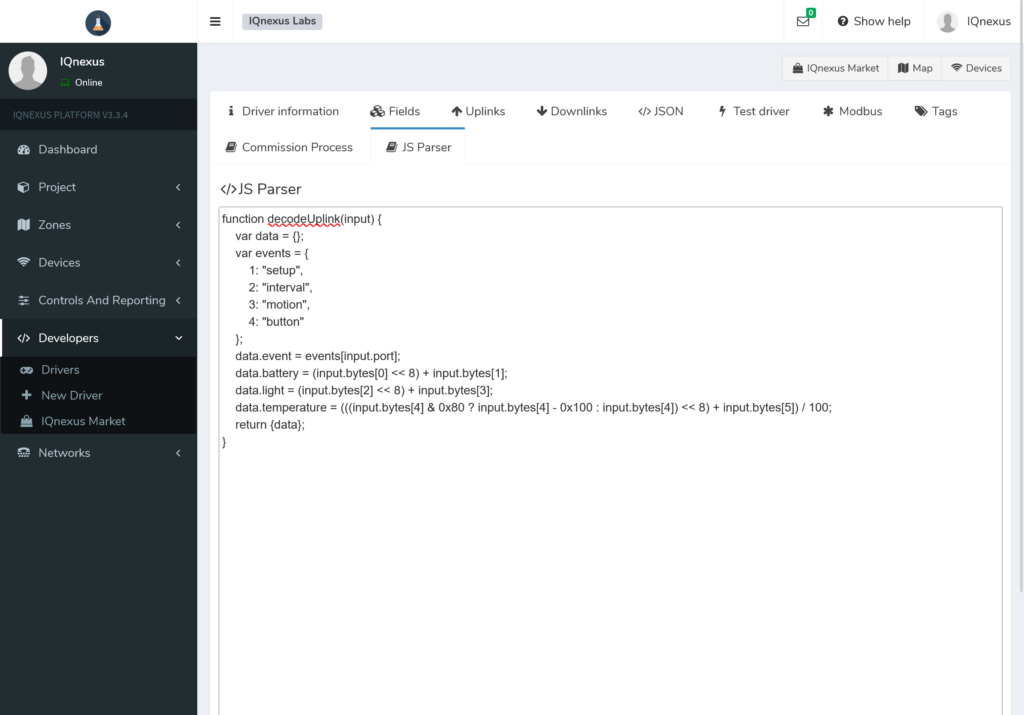
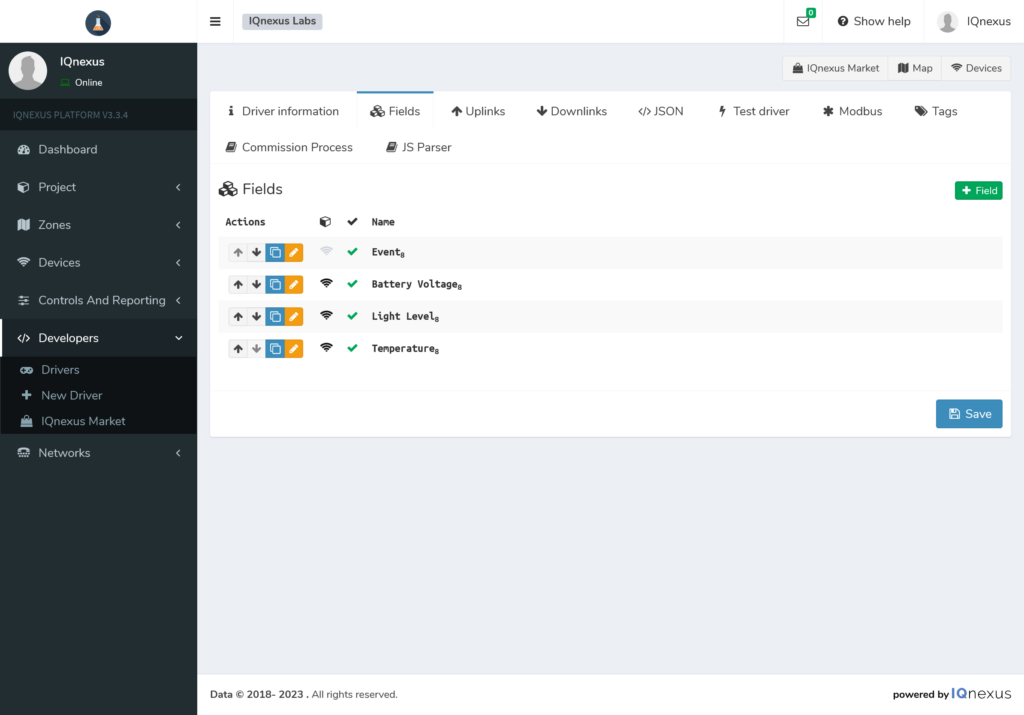
To display JS parser data, fields have to be created for each KPI in the data:{} object.
Using the example above fields have to be created for event, battery, light, and temperature.
Navigate to the Fields tab and click on new field.
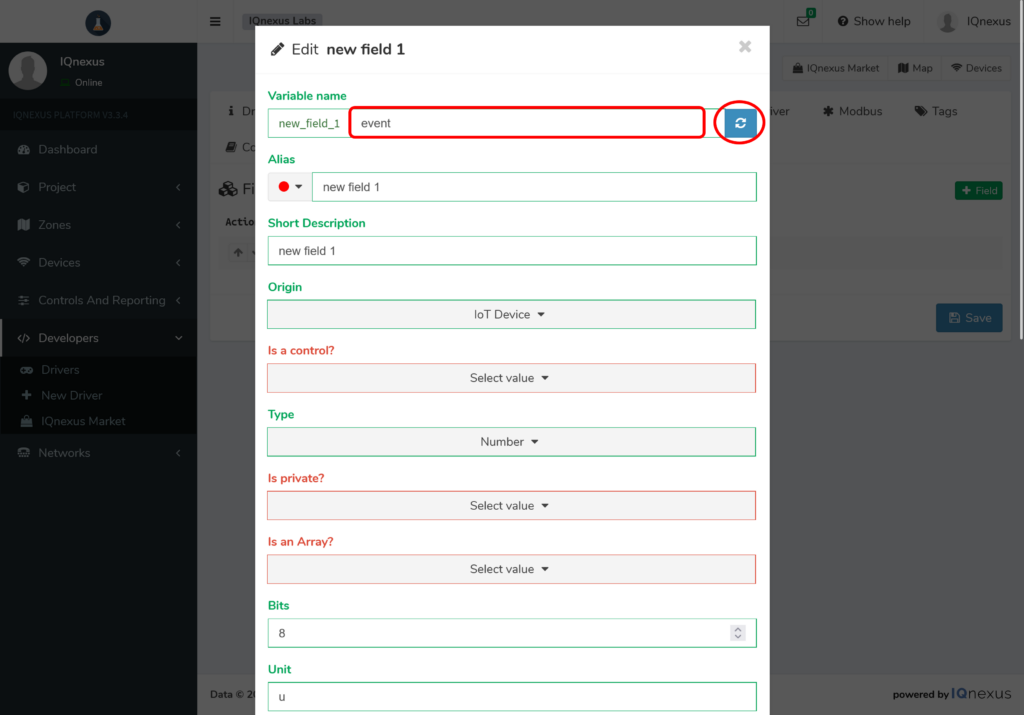
In variable name you must use the same name as assigned in the data{} object. remember that the KPI names in the object will be flattened and made lowercase.
Ensure you press the refresh button to assign the variable name.
From this point you may assign an Alias, and short description. these will be displayed in the logs, and stats of the device on the platform.
Field Options
Origin: Keep as IoT Device
Is a control?: Select No
Type: Set to Number or Text, depending on the output of the JS parser
Is private?: Select yes if you wish to hide the KPI from logs
Is an Array?: Select No
Bits: Have no effect on JS parser KPI
Unit: Type appropriate unit, this will be shown in stats and dashboards
Factor: Keep as 1. Factors should be applied in JS parser
Offset: Keep as 0. Offsets should have been applied in JS parser
Decimals: Set appropriate precision for your KPI
Minimum: Set this to the absolute minimum value your JS parser will output. Uplinks with values below this will be excluded from logs.
Maximum: Set this to the absolute maximum value your JS parser will output. Uplinks with values above this will be excluded from logs.
Group By: This will be used when displaying stats when looking at hourly, or daily data.
Is it incremental data?: Set to yes only if you wish to see the delta of that KPI, actual value will not be displayed.
Indicates package number?: Select No
Is signed?: Select yes if KPI value can go negative.
Endianness: Leave as Big Endian. Has no effect with JS parser.
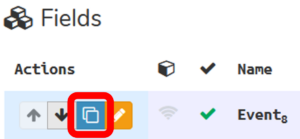
Once you have configured the field, you may click OK. Do this process for every KPI you wish to display from the data{} structure. You may duplicate fields already created by pressing the copy button indicated below
See fields for device using JS parser example from earlier. Note that the Event field has been set to private, so is shown as grey on in the fields tab.
Once you have finished creating fields, you may click save, and add a device using your new driver.
If you have any questions contact us!