Creating a new zone
When creating a new zone you can decide whether to make it stand alone or a sub-zone.
-
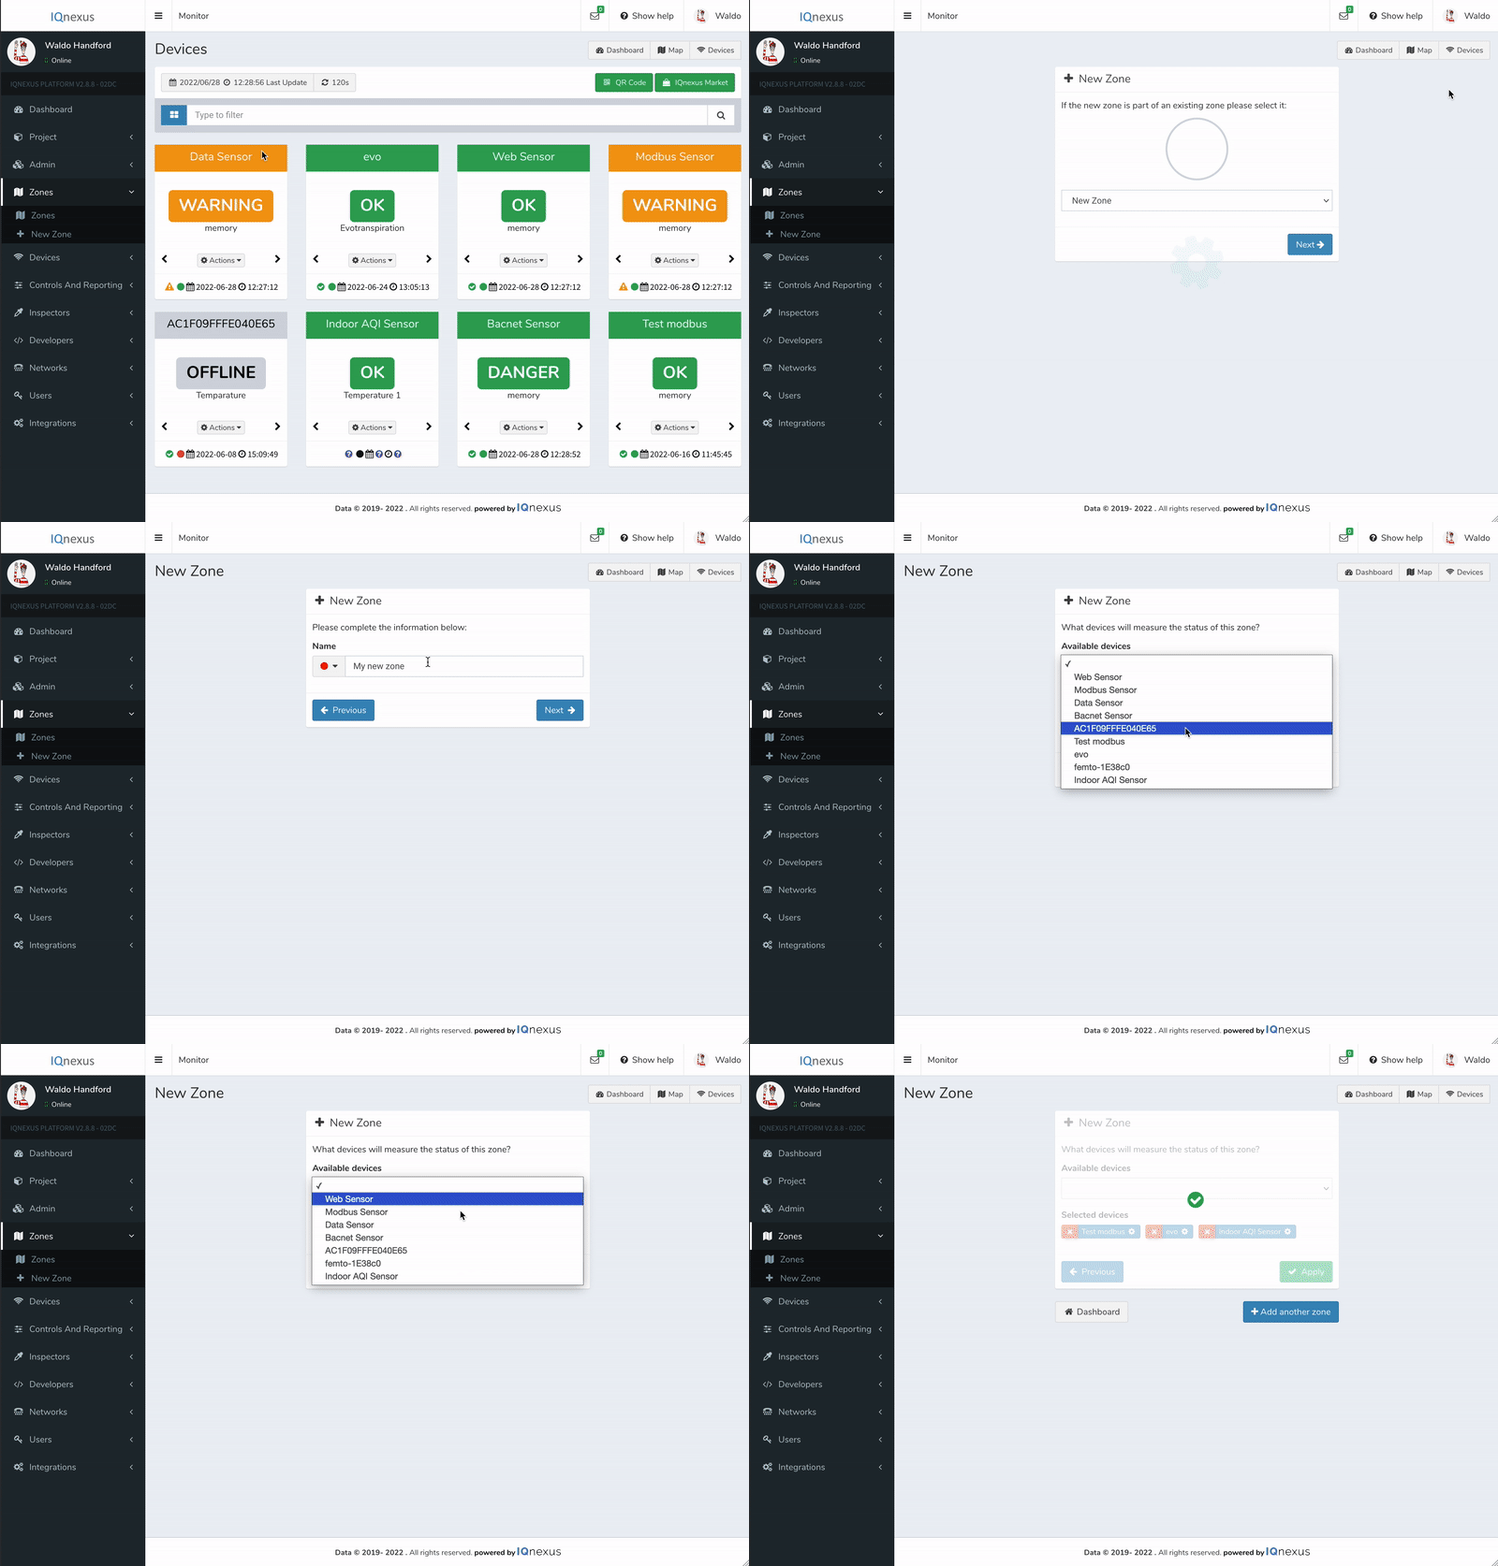
From your dashboard navigate to the project you want to add a zone to.
-
Select new zone from the sidebar menu under zones.
-
Select new zone or the name of the parent zone from the drop down table and click Next.
-
Choose the Default mode and click Next to create the zone.
-
Select the purpose of your zone. This window gives you the option to define it as ‘Administrative’, ‘Farm/orchard’ or ‘Geographic’.
Geographic allows you to set the area where the devices will be located using the map tool.
Farm, Orchard allows you to enter details related to your farm as well as the map feature.
Administrative is a way to easily organise your devices based on some other criteria e.g. department. -
Name your zone and choose an identifying colour.

Continue to add devices to your new zone.
Please, contact us if you would like to use the third-party software EnteliWEB or Wattics

