Manual LoRaWAN LAN Setup
A LoRaWAN Gateway provides the link between the NBnano platform and your devices. Depending on the number of devices and area you are covering, you may need more than one gateway.
This article contains all the required information to configure and to connect your Gateways to the NBnano, and how to set up a private LAN with static IPs connecting your devices.
Items Needed
| Product Name | Quantity | Image |
| Registered NBnano + package contents | 1 | |
| Ethenet Switch (not included) | 1 | |
| Gateway Package Contents | minimum 1 |  |
Network Physical Setup
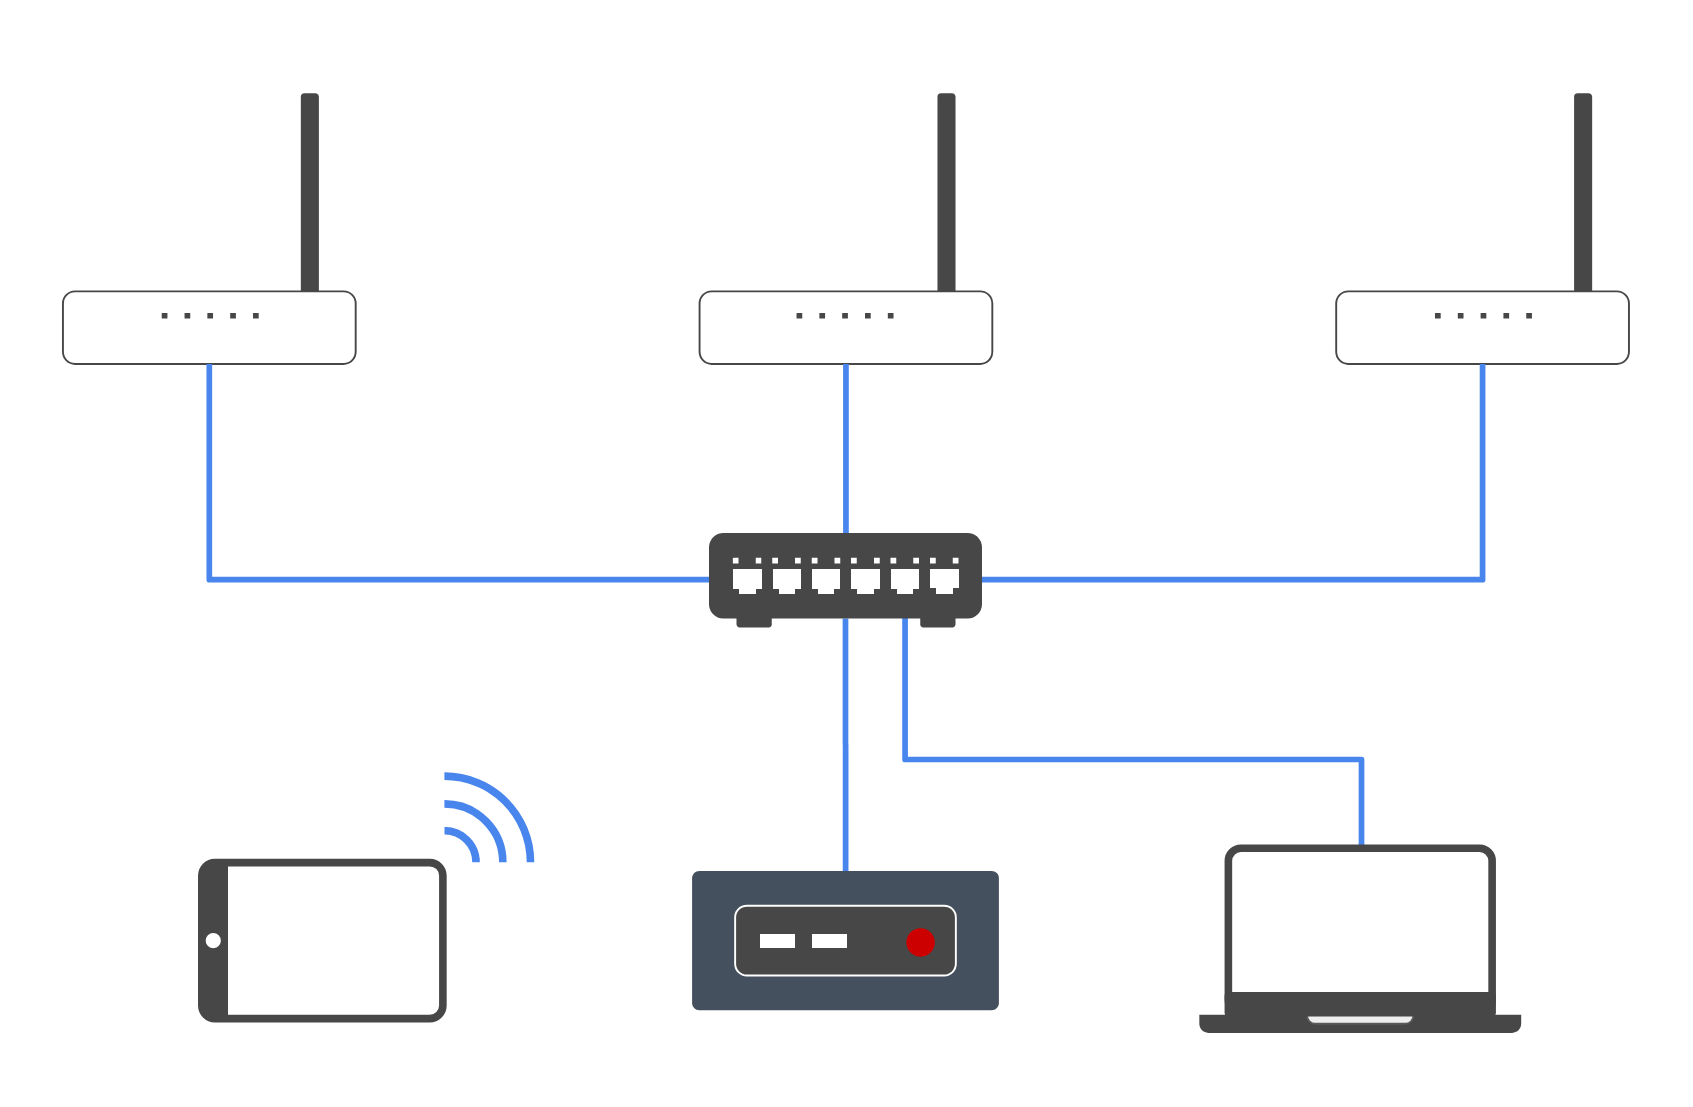
Connect your NBnano and Gateway to an Ethernet switch via their Ethernet ports.
Ensure that antennas are attached to the gateways, and all devices are powered using their provided power cords.
NBnano network configuration
Step 1: Connect to your NBnano’s WiFi network using the credentials configured during registration.
Step 2: Open your browser and browse to “192.168.12.1” to reach your NBnano Platform.
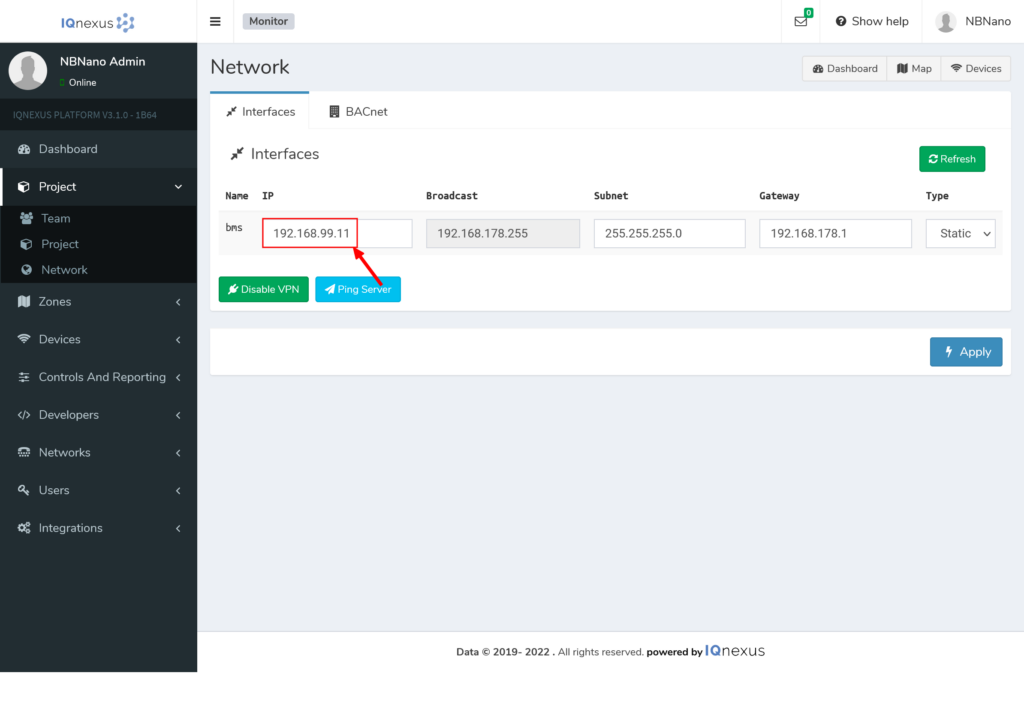
Step 3: Log in and navigate to Project -> Network’, here you will see 3 networks.
Step 4: Change the network interface labeled BMS from DHCP to Static and assign it a new IP address on the same range as the end building network. Here we use 192.168.99.11 as the IP address for the NBnano. Click the Apply button for your changes to take effect.
Gateway network configuration
Step 1: Follow the tutorial “LoRaWAN Gateway Configuration” if your gateway did NOT come pre-configured, otherwise you can continue with step 2.
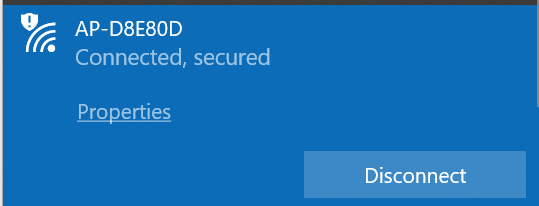
Step 2: Connect to your gateway’s WiFi network using a PC. The WiFi Name will be “AP-<Last 6 digits of MAC>” and can be found on the back of the gateway.
Step 2: Open a Browser and browse to 192.168.55.1
Step 3: Login with: user: admin password: Use password provided or setup on Step 1
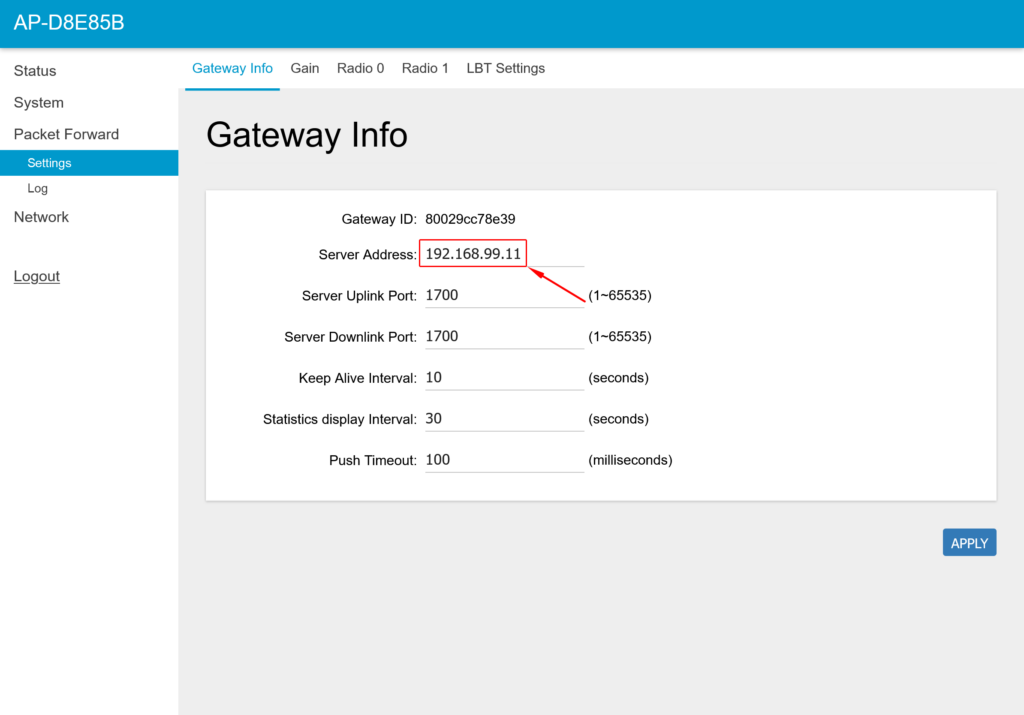
Step 4: Connect again to your gateway and navigate to Packet Forward > Settings. Set the Server Address to the IP of your NBnano. Take note of the Gateway ID, as this will be used later on when adding the gateway to the NBnano.
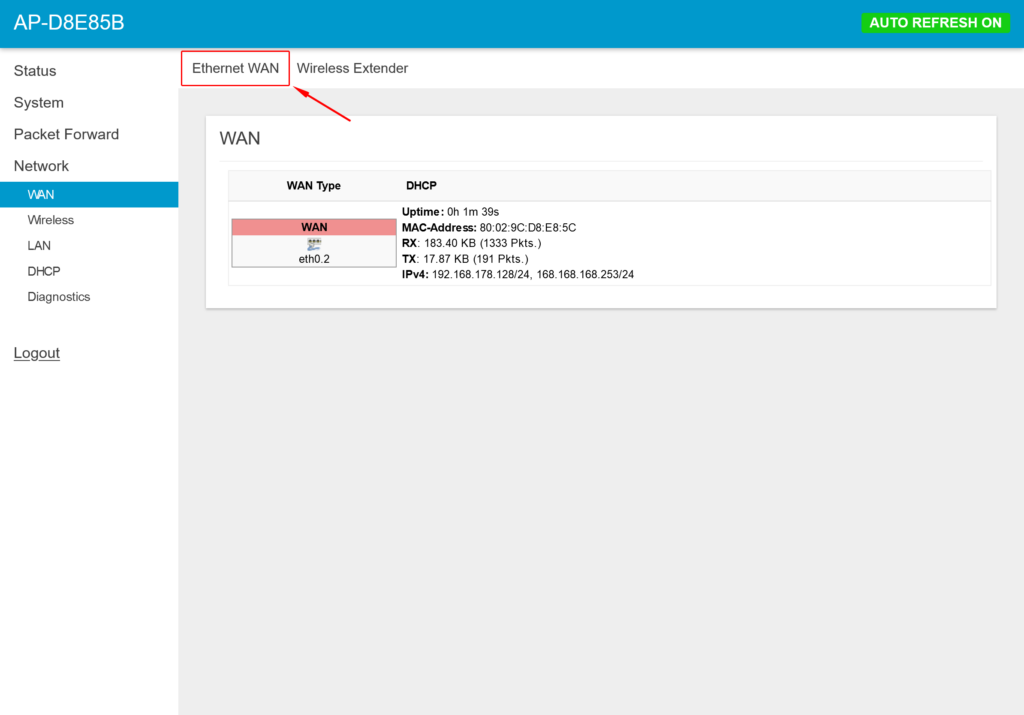
Step 5: Go to ‘Network -> WAN -> Ethernet WAN’.
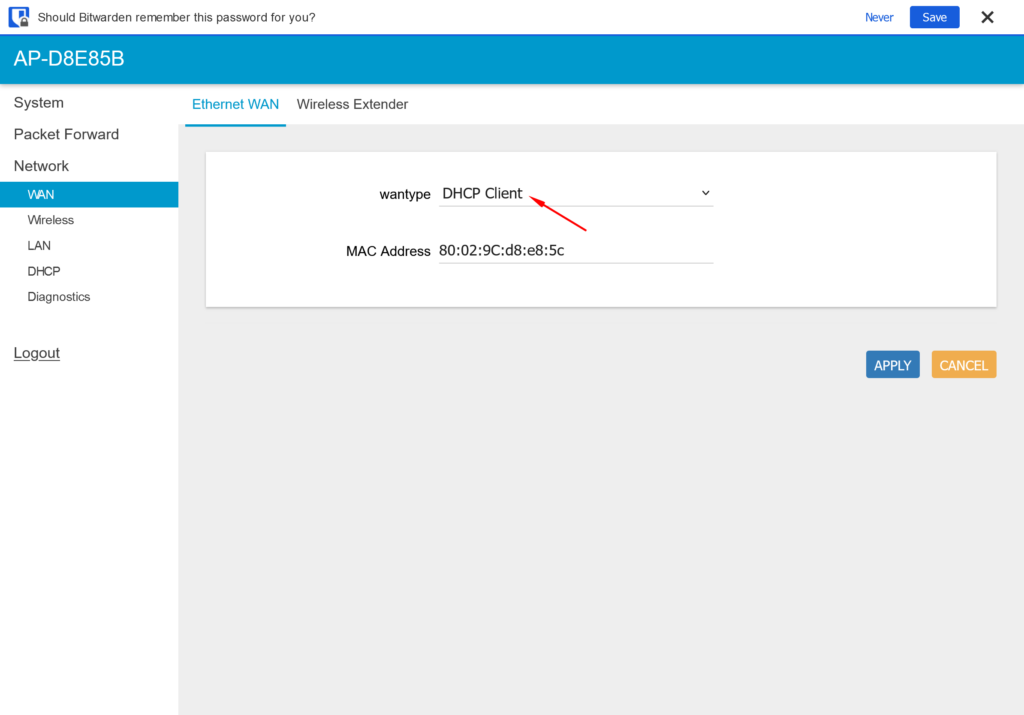
Step 6: Change the wan type from DHCP Client to STATIC IP.
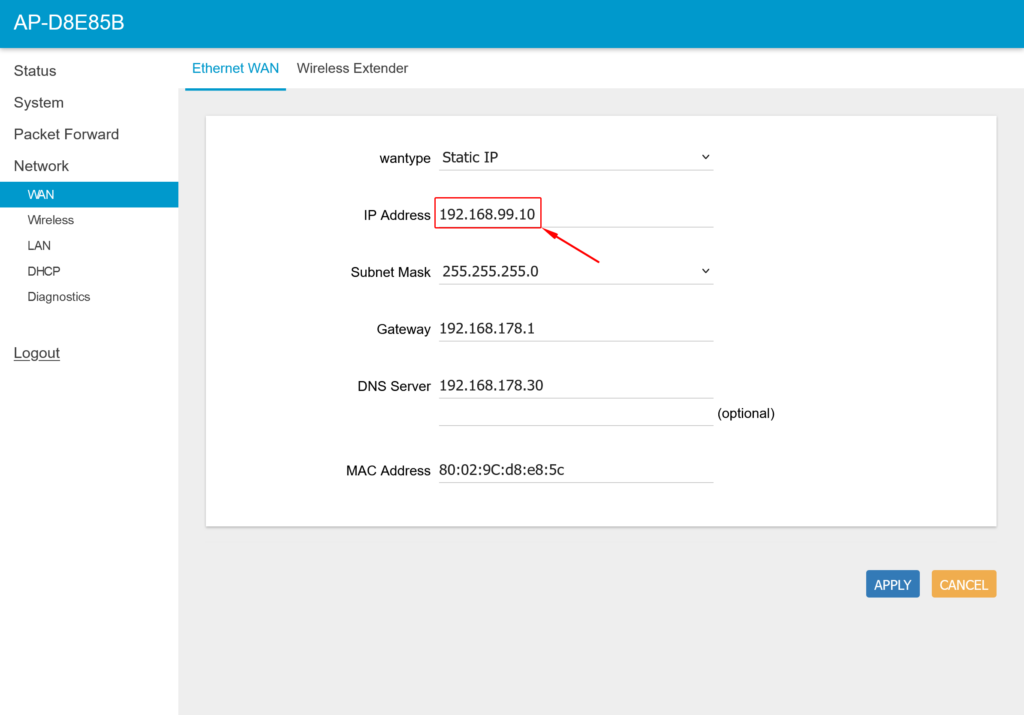
Step 7: Change the IP to something on the range of the NBnano (192.168.99.10 in this case) as seen below. Use your local gateway and DNS server setting if you have them otherwise use a free IP address from the same range. Apply, and wait for the device to reboot.
Step 8: (optional) Once the gateway has re-booted, ensure that the gateway and NBnano can communicate with a Ping.
Navigate to Network>Diagnostics and fill in the NBnano’s static IP address on the field above the PING button. Once filled, pressing the PING button to test the communication between the gateway and NBnano. A successful communication will result in the screen below.
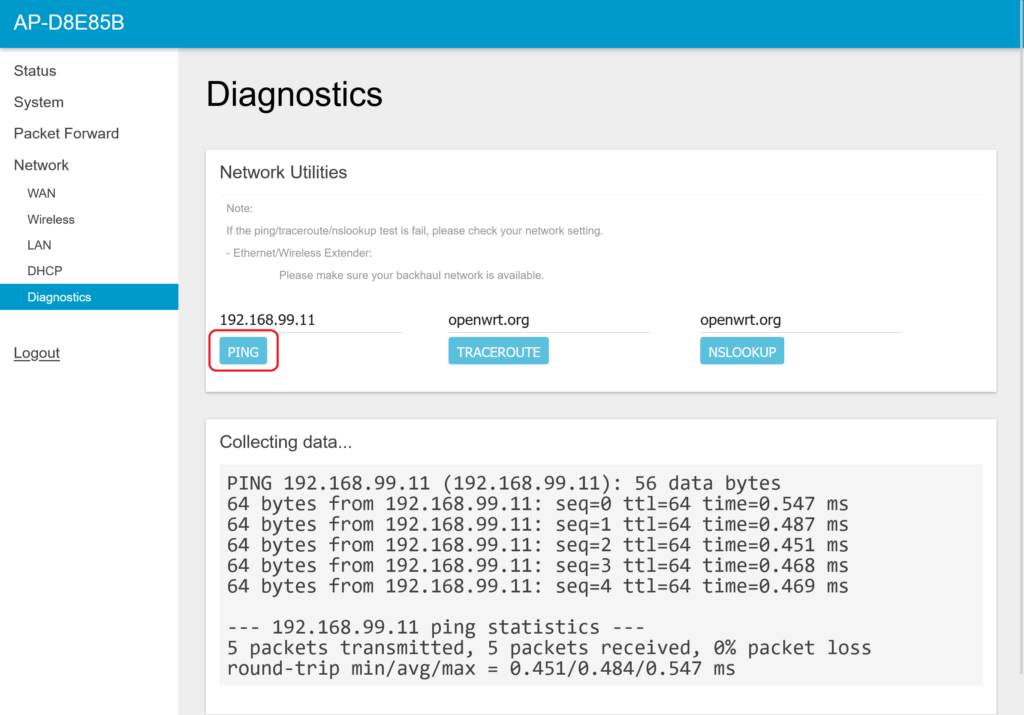
If there is an issue with network configuration or cabling the output will show 100% packet loss. In the case of an error carefully follow the instructions above, ensuring gateway and NBnano are on the same IP range, and the gateway is wired into the same network as the NBnano.
PC network configuration (optional)
If you cannot connect to the NBnano via WiFi then you may connect via LAN. To do this you will need to wire your PC into into the NBnano LAN network and set your PC to have a static IP. Follow these instructions to do so.
1: Open your Control Panel and click the network & internet.
2: Click Network and Sharing Center
3: Here the networks you are currently connected to are shown. Now click the Ethernet right after the word ‘connections’.
4: A new window will pop-up. Click ‘properties’ and a new window will pop-up again.
5: Now Look for Internet Protocol Version 4 (TCP/IPv4) and click ‘properties’.
6: In the new window choose ‘use the following IP address’. Enter the information as per the image below:
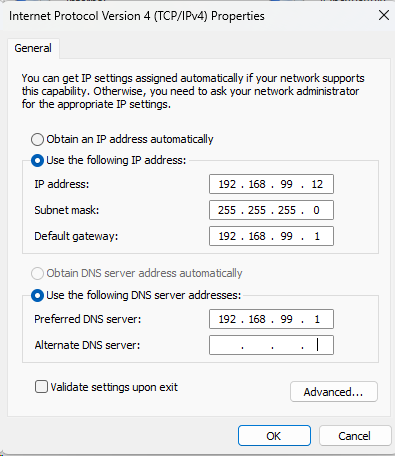
You can now access the NBnano Platform through the LAN using a browser pointing at the NBnano IP address (192.168.99.11 in this example).
If you have any issues, please Contact us.