gateways old
The LoRa Gateway included is easy to configure and connect to your NANO and provides the link between the NANO platform and your devices. Depending on the number of devices and area you are covering, you may need more than one gateway.
This article contains all the required information to configure and connect your Gateway to the NANO.
Please note that if you have received a pre-configured system you can skip the following steps.
Connect to the Gateway via Wifi
- Power the Gateway and ensure the power light goes fixed green.
- The SSID will be “AP-<Last 6 digits of MAC> and can be found on the back of the gateway.
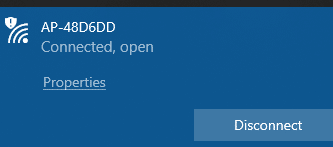
- Select the device and click Connect.
- Open a Browser and browse to 192.168.55.1
- Login with: user: admin password: admin
Check for Firmware Updates on the Gateway
-
Navigate to System → System Firmware
-
Press the “Check new firmware” button
-
If new firmware is available, update the firmware
-
If an update is installed, the gateway will reboot.
Enter Provisioning Code
-
Navigate to System → Overview
-
If the provisioning code is required, enter the following code depending on your Region.
AS923 – New Zealand/Asia
314022001923
AU915 – Australia
AE8722001036
The device will restart and you will need to:
-
Reconnect to the AP
-
Browse to http://192.168.55.1
-
Login with: user: admin password: admin
Set Frequency Band and Server
Server
-
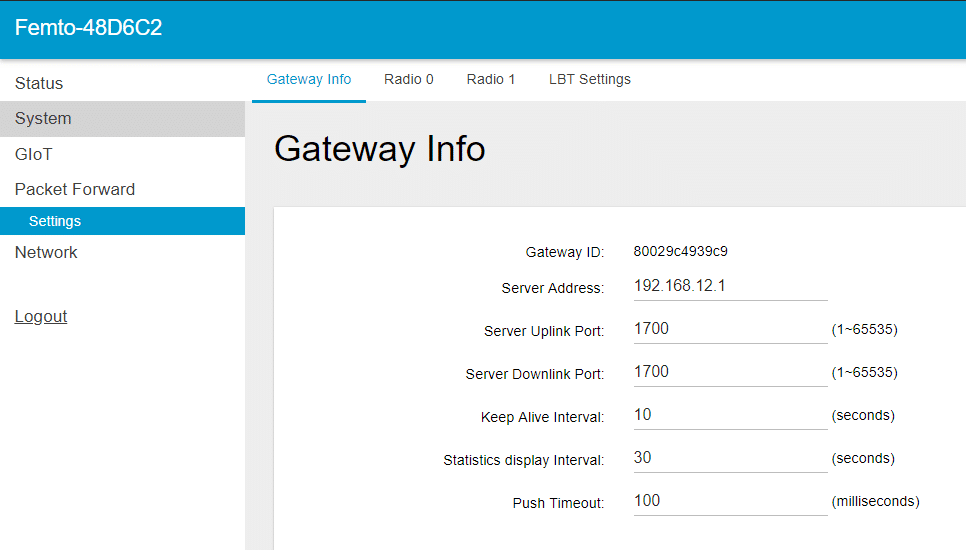
Navigate to Packet Forward → Settings
-
Set the Server Address to the IP of your NANO. 192.168.12.1.
Will be different to below if you are connecting to the gateway via Ethernet.
Frequency Band
-
Navigate to Packet Forward → Settings
-
Set Central Frequencies for Radio 0 and Radio 1 based on the frequency band of your region( see below)
AS923
Packet Forward → Settings → Radio 0
|
Central Frequency |
923500000 |
Packet Forward → Settings → Radio 1
|
Central Frequency |
924300000 |
AU915
Packet Forward → Settings → Radio 0
|
Central Frequency |
917100000 |
Packet Forward → Settings → Radio 1
|
Central Frequency |
917900000 |
Change Gateway WiFi AP Password
It is very important you set a secure AP password. An open AP can provide an entry point into your local area network.
-
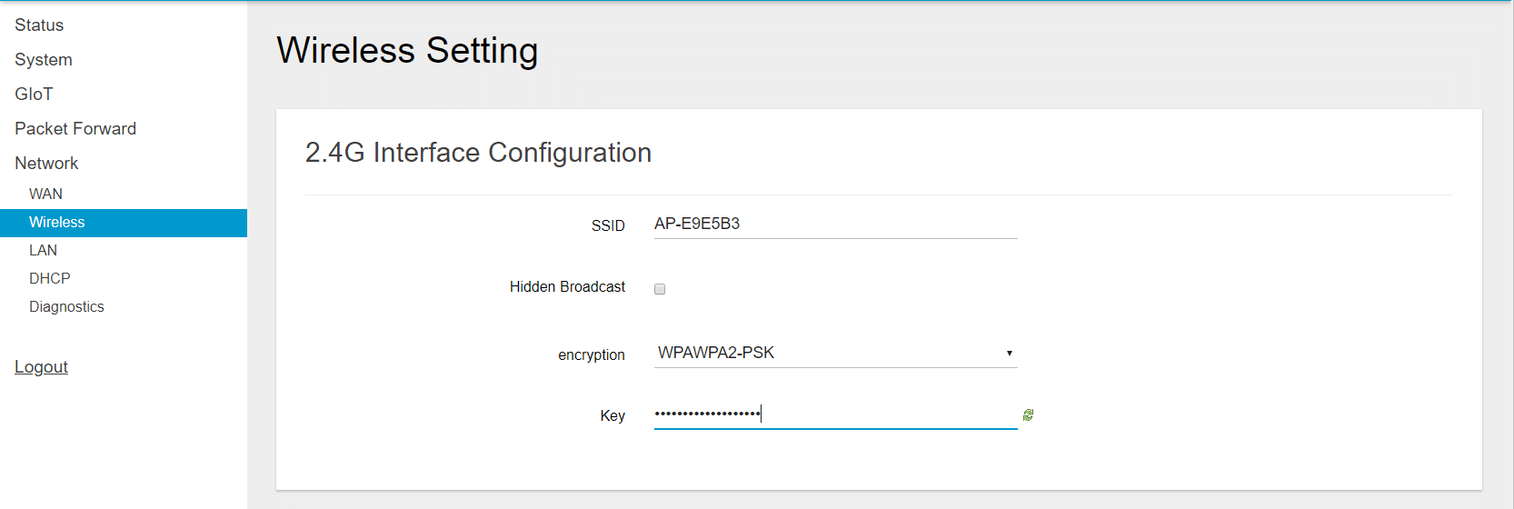
Navigate to Network → Wireless
-
Set encryption to WPAWPA2-PSK
-
Enter new password in Key
Connect the Gateway to the NANO via WiFi
-
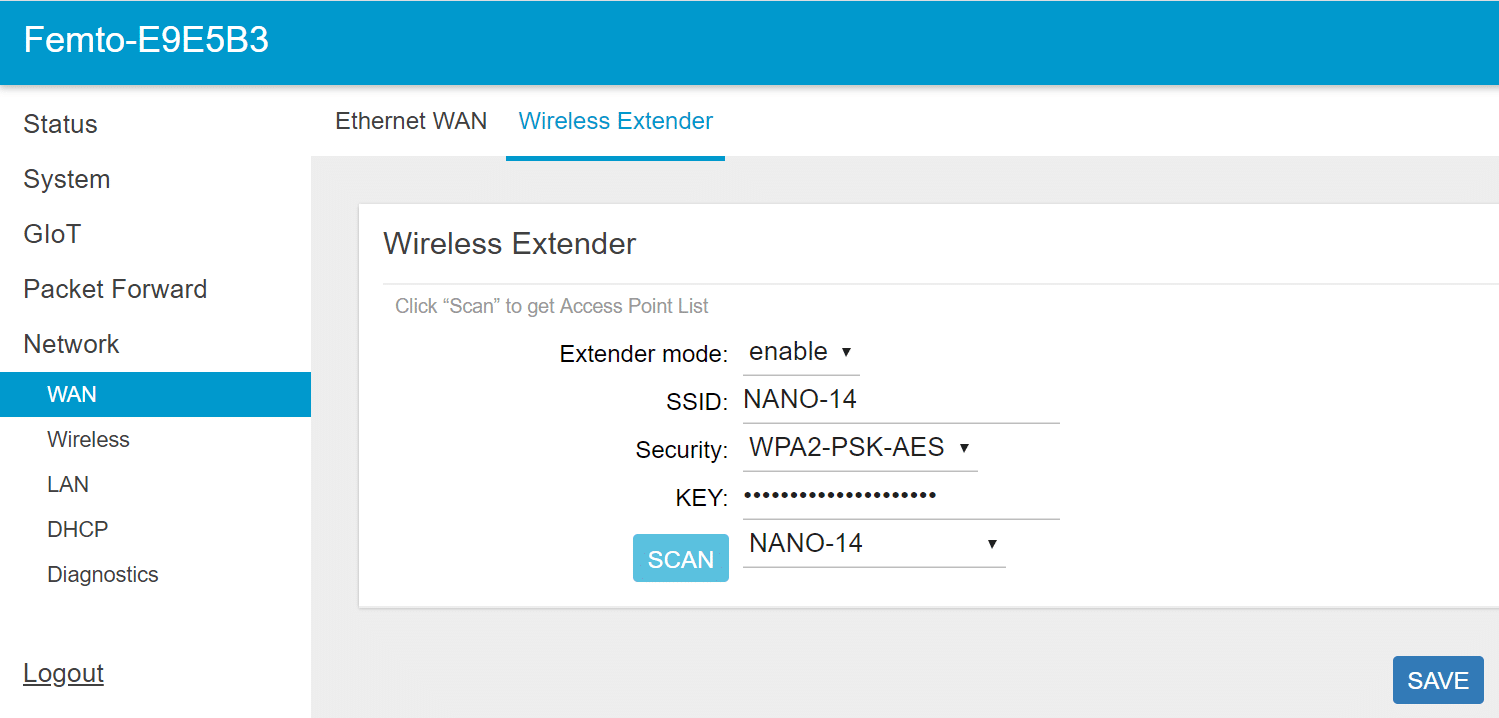
Navigate to Network → WAN
-
Select the Wireless Extender tab near the top
-
Change Extender mode to enable and click Scan
-
Now from the drop-down menu beside Scan, Select your NANO (NANO-XX)
-
Enter the Password you just created above into the Key field
-
Click Save and the Gateway will Reboot.
Registering the Gateway on the NANO’s LoRaServer
The NANO acts as the LoRa Server for your local LoRa network. This server is accessible through the admin account and is where you add devices and gateways to your network.
-
Reconnect to your NANO like you did before
-
Go to the URL monitor.nano.local:8080
-
login with: user: admin password: admin
-
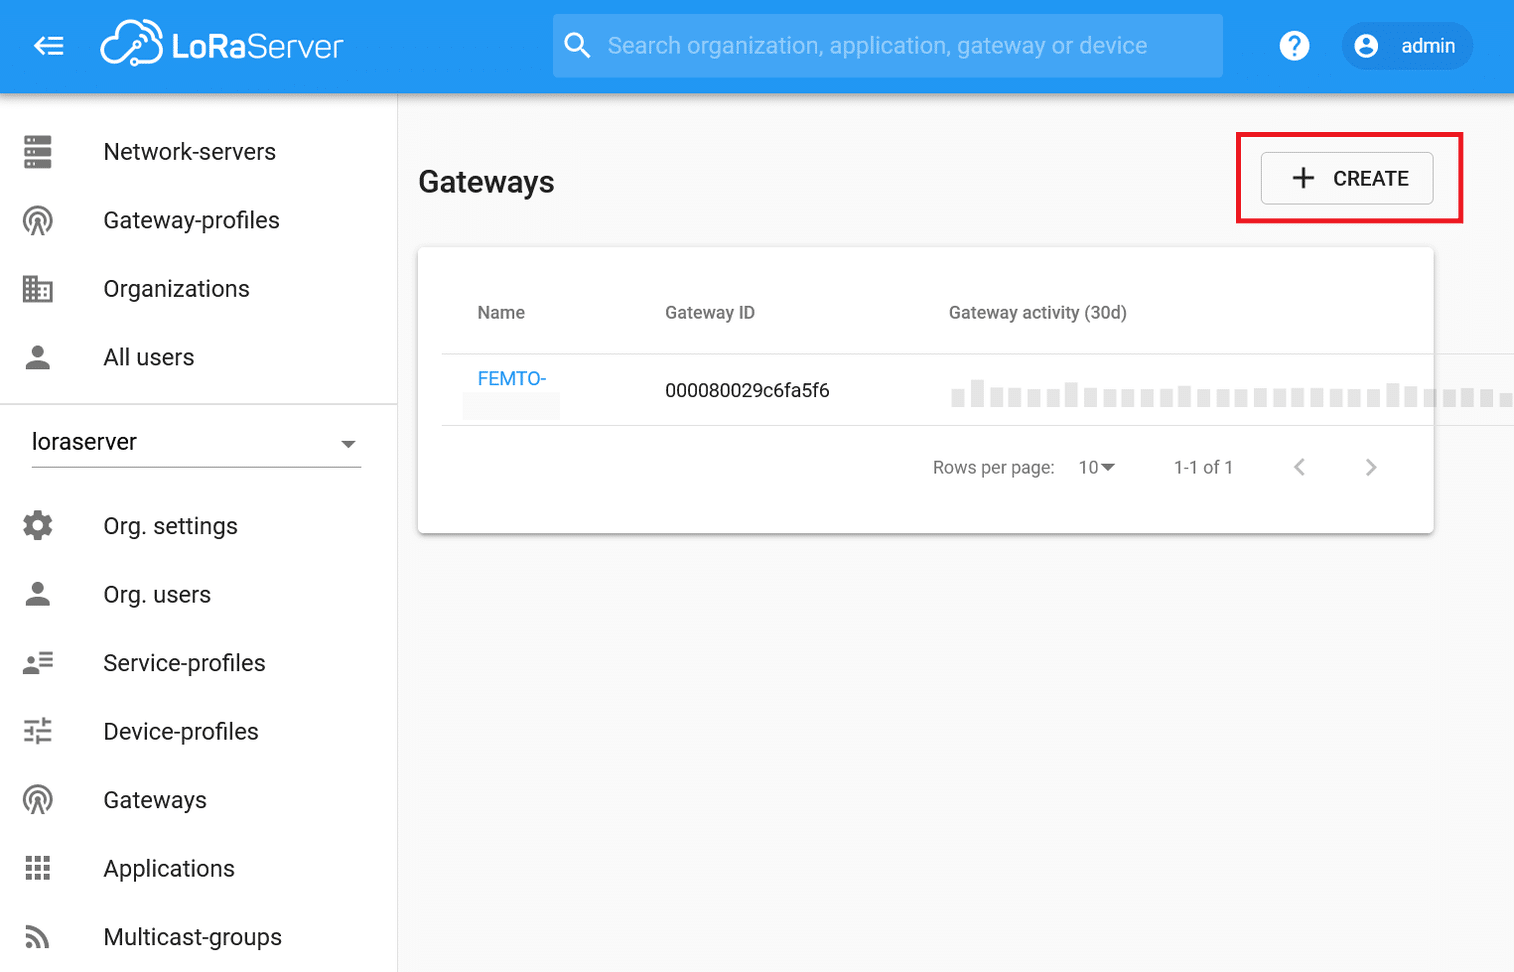
Navigate to Gateways → Create
-
Enter your gateway’s details
Gateway ID: Can be found at Packet Forward → Settings under Gateway Info, first row.
Name: Choose a name for your gateway -
Click Create.
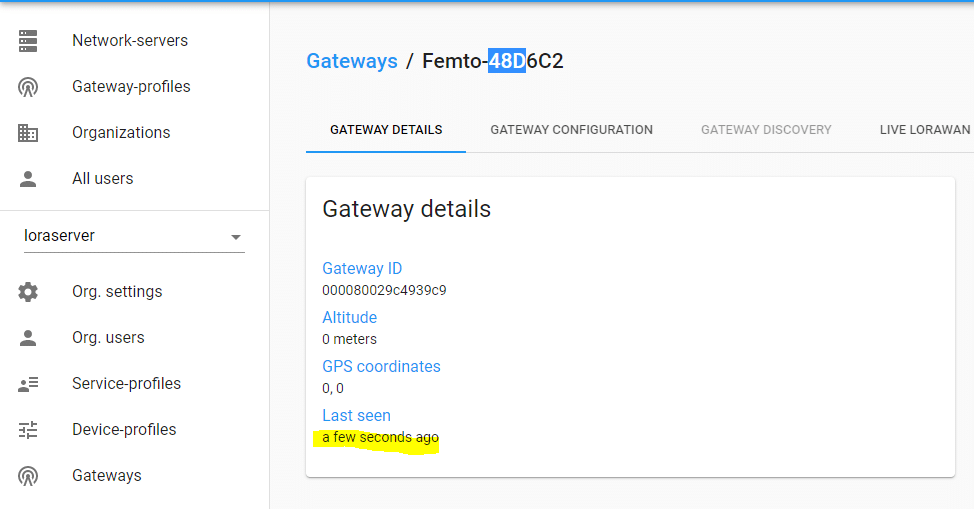
Test Gateway Connection
-
Navigate to Gateways → Femto-<last 6 digits of MAC>
-
Under Last Seen should be a recent time
Registering your gateway on the NANO
If you’d like to see uptime information about your gateway, we can add it to the platform.
-
Navigate to your dashboard.
-
Go to the IQNexus marketplace (‘Devices’ → ‘IQNexus marketplace’).
-
Find a driver called ‘Loraserver Gateway’, and from the action menu select ‘New Device’.
-
Under DevEUI, fill in the gatewayID, for example ‘80029c4939c9’
-
Under name, fill in the name of the gateway, for example ‘Femto-48D62C’
-
If you have Modbus or BACnet enabled, please fill in your Modbus/BACnet details.
-
Next, at the message calculator, fill in how many messages you would be expecting and for how long you’d like to store the messages.
-
Fill in the remaining configuration and press ‘Apply’.
-
You will be taken to the gateway list page, also accessible through ‘Devices’ → ‘Gateways’.
-
You can now select a gateway and view the associated data.
If you have any issues, please Contact us.