SenPulse Single
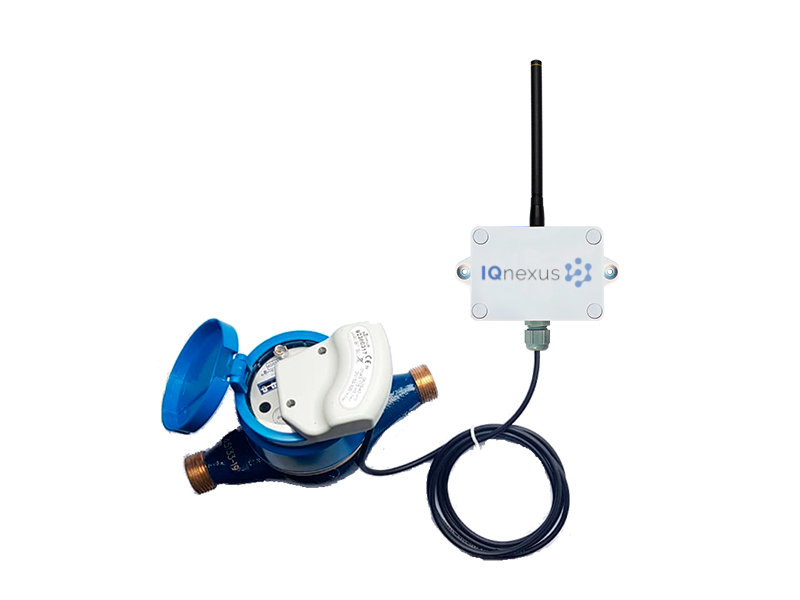
This is an overview of the SenPulse Single, a device which is compatible with any existing pulse based meter and makes this data readily available online. This page will explain how to configure a SenPulse Single and connect it to the IoT platform.
Features
-
Compatible with residential water-meters, gas or power
-
Detects reverse flow
-
Tamper detection
-
Burst detection
Configuration via Downlink
Before you can configure via downlink you must Add your device to the platform.
-
Navigate to the device and select Actions → Controls from the menu beside the device.
-
Select Device Config from the Downlink selection drop down menu and complete the downlink fields below.
-
Click Queue to add to the downlink queue.
|
Wakeup Period |
Set the period you want your device to wake-up and transmit a meter reading. |
|---|---|
|
Rejoin Period |
The period at which your device will rejoin the network |
|
New Hour |
Overwrite your device’s time |
|
New Minute |
Overwrite your device’s time |
|
New Second |
Overwrite your device’s time |
|
Update Time |
0 if you are not updating the time, 1 if you are. |
To update Burst settings select Count Params from the Downlink selection drop down menu and complete the downlink form.
Click Queue to add it to the downlink queue.
|
Burst Hours |
Overwrite your device’s Burst Hours (see Burst detection below) |
|---|---|
|
Burst Threshold |
Overwrite your device’s Burst Threshold (see Burst detection below). |
|
Debounce |
Sets a delay between the interrupt and the count read. We suggest about 10 ms. |
Finish configuring your device by synchronising the platform with your device.
Synchronising the pulse count
Set the initial count on the platform
-
Navigate to your device and select Actions → Setup Device.
-
Select Data → Constants drop down menu.
-
Under Initial Count enter the current pulse count displayed on your meter.
-
Under Pulse Factor enter the multiplier to apply to the incoming counts.
e.g. If your device emits 1 pulse every 10 liters enter a factor of 10. -
Click Save.
Clear the count on the device
This step is required if your device has been running at all before this.
-
Navigate to your device and select Actions → Controls menu.
-
Select Count 1 from the Downlink selection drop down menu.
-
leave Count1 as 0 and change Update Count 1? to 1.
-
Click Queue.
We recommend setting up Alert Thresholds once you have fully configured your device.
Tamper Detection
Most residential water meter adaptors include a tamper detection line. This is a wire that is constantly pulled to a high logic state if the wire is connected, the device has power and is attached to the physical water meter.
Therefore, if the Smart Meter is tampered with in anyway to prevent measurements it is instantly detected by the device and transmitted to the Platform. You can create an alert on the tamper value to be notified by SMS or email if this occurs, set the upper normal limit to 0.
Common tampering alerts are from low battery or someone interfering with the device.
Burst Detection
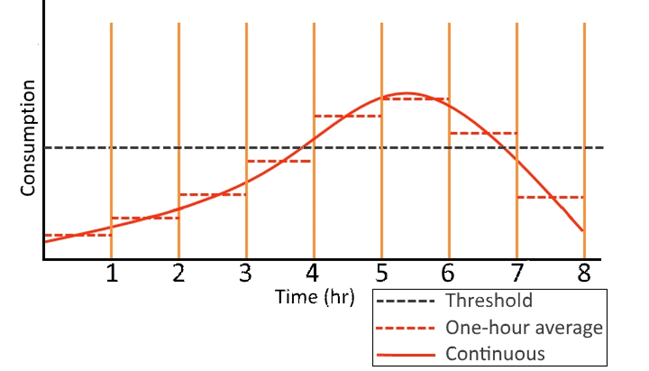
This feature notifies the user if a specific hourly consumption level is crossed for a defined number of consecutive hours. The User defines the maximum hourly consumption with count burst and if this threshold is exceeded for a number of consecutive hours equal to count burst_hours an Alert is triggerd.
The figure below shows an example of this. The count burst threshold is exceeded at hour 5, 6, 7 and if the count burst_hours threshold is set to 3 an alarm will be triggered at hour 7.
Example
Consider a single pulse counter device connected to a residential water meter of a family that all leave the house for work and school during the day. Based on their usual usage, this family expects water consumption of about 300 counts per hour maximum. Therefore they configure their device with a count burst of 300. They set a count burst hours value of 3, which means 300 counts per hour must occur 3 hours in a row, to prevent a false alert under special circumstance. Imagine, then, Johnny is running late for school in the morning and, in a hurry, his bathroom tap is left on as he runs out the door. Then, after 3 hrs, the device will detect this as a burst and send an alert to the family. Conversely, imagine johnny’s entire soccer team comes around after their game and showers. This is unlikely to trigger an alert due to the 3 consecutive hour threshold.
To disable this feature set the threshold values count burst and count burst_hours to 60000. This is a large enough value that it will never alarm
Configuration via serial
It is not necessary to have a meter connected to configure the device
-
Connect the device to your PC via serial.
-
Now you can use the commands below to configure report rate, burst threshold and current time, similar to the example below.
Smart meter commands
|
count invert_dir [true|false] |
Sets whether the Direction pin is activated by a high or low signal. (high:true) |
|
count debounce [time] |
Sets the sleep time between measurements in milliseconds. Minimum of 200ms |
|
test count |
Enters a test mode showing the state of the inputs. |
|
count burst [threshold] |
Sets the threshold for maximum counted pulses in any given hour (counts) Maximum value = 511 pulses. |
|
count burst_hours [hours] |
Sets the number of consecutive hours that the burst threshold can be crossed. (hours) Maximum value = 4000 hours. |
|
count clear |
Resets the stored count to 0 |
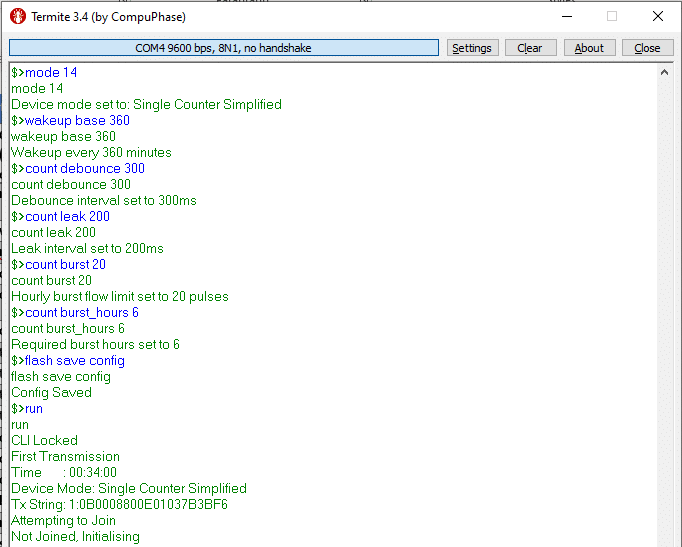
Single counter example
The following snippet shows the configuration of a single counter device.
-
wakeup base 360 – set to transmit every 6 hrs.
-
count burst 500 & count burst_hours 6
-
burst triggered by more than 500 counts in an hour for 6 consecutive hours.
-
-
flash save config – saves configuration in case of restart.
Glossary of Terms
|
count |
Stored number of pulses read from the meter. This is incremented every pulse and is only cleared by the count clear serial command. |
|
pulse |
The measured quantity by the device. Output from the utility meter. |
|
uplink |
An uplink is a message sent from your device to the platform over the network |
|
downlink |
A downlink is a message sent from the platform to your device over the network |